Posts tonen met het label grade 3. Alle posts tonen

zaterdag 30 oktober 2010

Collage of geometric and organic shapes

Made by students of 8-9 years old

A lesson I found on Artsonia. It's a great lesson to explain the different shapes and to practice cutting and pasting skills.

You need:
  1. black construction paper 18 by 18 cm
  2. four coloured sheets 16 by 16 cm in different colours
  3. scissors
  4. glue
  5. left overs black construction paper
Start this lesson with an instruction on geometric and organic shapes. A geometric shape is a shape with a name, like a rectangle, circle or square. It's shape is regular. An organic shape is a shape from nature, without a real name. The shape of a leave or animal is organic, but cloud shapes are organic too. An organic shape is a shape you can not describe, that has no name. It is irregular.

Choose four sheets with matching colours and fold them in four quarters. Cut the folding lines to get 16 squares of 4 by 4 cm. Put four rows of four squares neatly against each other on the black sheet. Do not place two of the same colours side by side. Glue the squares. Cut a number of organic shapes out of black paper. Create a beautiful composition on the sheet with squares and paste the black shapes. The shapes should not overlap.

zaterdag 16 oktober 2010

Awesome alphabet

Made by students of grade 6

You need:

  1. drawing paper A6 size (postcard)
  2. markers
  3. fine black marker
  4. black cardboard
  5. glue
Arrange which students makes which letter of the alphabet. The I and J have to be drawn on one sheet, to make a group work of five by five drawings. Each student draws one big letter, with about 1 cm free space around. Colour the letter as you like, using patterns. Colour the background as well. Outline the letter and the details with a fine black marker. Make sure the letter 'pops up' from the background, by choosing different colours and patterns. Paste all letters on a big black cardboard, five by five with 2 cm space between them.

Group work 'Awesome alphabet'

woensdag 13 oktober 2010

Photo fun

You need:
  1. copy of a photo of the student in black/white, A4 size
  2. coloured construction paper A4 size
  3. ruler
  4. scissors
  5. glue

Take a digital photo of each student and print in black and white on A4 paper. Students draw on the back of the picture horizontal lines with 2 cm space between them. Cut the lines. Paste the strips with half a cm between the on the coloured paper.

With the name of the student and his birthday under the arwork, this is a nice birthday calendar for in the classroom.

dinsdag 12 oktober 2010

Reflected canal houses

You need:

  1. white drawing sheet A4 size
  2. white crayons
  3. watercolour paint
  4. brushes
  5. jar with water
Dutch canal houses are famous for their facades: stepped gable, neckgable, bell gable, clockgevel or spoutgable. Draw those five gables on the blackboard and discuss them. Search the internet for photographs of canal houses or let the students search them (search canal house or grachtenhuis).

Draw a line at 12 cm from the bottom of the sheet. Draw some low canal house with a white crayon. Draw windows, treps and doors in them. Paint every house with a different colour of watercolour paint. The crayon will resist the paint and become visible. Paint a simplified reflection of the house under the line. Paint water and air.

maandag 4 oktober 2010

Calligram

Our Dutch calligrams; do you recognize the meaning?

You need:
  1. drawing sheet A6 size (postcard size)
  2. pencil
  3. fine black marker

A calligram is a phrase or word in which the typeface, calligraphy or handwriting is arranged in a way that creates a visual image. The image created by the words expresses visually what the word or words say.

Show some calligrams on the smartboard. Discuss them with the students. How was the calligram made? What word(s) do you see? What kind if image is it? Students choose something they want to draw. With a pencil they draw the outlines of it on a sheet. Using a fine marker they write their drawing full with the words that belong to it. Erase the pencil lines when the ink has dried. There are two ways to do it: fill the drawing completely with words, or write the words only on the outlines of the drawing.

Sometimes it is better, and/or nicer, to colour your calligrams. In the example above, the food calligram, you won't probably recognize the food on the plate. With some colour (colour pencils) it is clear! The butterfly is coloured with coloured ink.

zaterdag 2 oktober 2010

Word art

You need:

  1. drawing sheet A6 size
  2. colour pencils or markers
  3. black fine marker

Each student selects a words to illustrate. The design for the word must reflect what the word represents. Someone who doesn't know the meaning of the word, has to understand what it means by looking at the design of it.

Use colour pencils or markers to colour the letters of the word. Use a fine black marker to outline the letters.

Well: although you don't know the meaning of the Dutch words in the examples my students made, you'll know what they mean thanks to the design! If not, they did a bad job?

Made by students of 11-12 years old

woensdag 29 september 2010

Fine lines

You need:

  1. black construction paper 20 by 12 cm
  2. coloured construction paper A4 size
  3. pencil
  4. ruler
  5. scissors
  6. cutter and cutting mat
  7. glue

This lesson is about lines. What kind of lines do you know? Straight, wavy, curved, bumpy, broken, spiral, zig-zag. Discuss different types of lines and let students draw examples on the blackboard.

Draw with a pencil nine different lines on the black paper with 2 cm between them. Cut the sheet carefully following the lines and place the individual pieces in cut order on the coloured paper. Draw with a pencil on the left and bottom of the colored sheet lines on 1 cm from the side. Paste the first black strip on the coloured sheet against the drawn lines. Paste the other strips with about a half cm space between them against the pencil line left.

When all stripes are pasted, cut at the top and right the excess coloured paper away leaving a frame of 1 cm.

zondag 26 september 2010

Tumbling blocks

Even though I'm not a fan of colouring pages, this one was a hit in my classroom! You need:
  1. printed sheet with tumbling blocks
  2. markers

I downloaded a sheet with tumbling blocks on Incompetech, a site full of free downloadable graph papers. Students had to choose three colours markers to colour the blocks. When finished, cut the drawing and paste it on a coloured background.

woensdag 15 september 2010

Birds like Corneille (2nd lesson)


This lesson about Corneille is almost the same as the lesson I posted a few days earlier. However, drawings in this lesson are made with oilpastels by students in a lower grade. 

 You need:
  1. white drawing paper A4 size
  2. oil pastels
  3. coloured ink
  4. brushes
  5. jar with water
  6. coloured paper for background
  7. glue or stapler
Life and work of Corneille
See my former lesson for information about the artist. 


What to do?

Show examples of Corneille's work. What subjects do you see in his paintings? What can you tell about his style: bright colours, thick black outlines, few details, painted as if it was made by a child, an image that sometimes is not complete (missing parts at the edges).
 
Draw the outline of a bird with a black crayon. Make surethe bird reaches at three edges of the sheet: it should be big! Colour in bright colours and/or patterns. Paint the background with deluted blue ink. Stick the drawing on a coloured sheet.
 
All artworks made by students of grade 3

zaterdag 11 september 2010

Animals like Corneille

You need:
  1. white drawing paper A3 size
  2. tempera paint
  3. brushes
  4. paper towels
  5. jar with water
  6. coloured paper for background
  7. glue or stapler
Life and work of Corneille
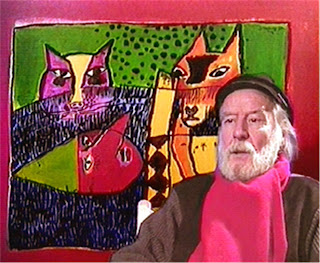
Guillaume Cornelis Beverloo (1922 - 2010), Corneille, was a Dutch artist, born in Belgium and died in France. He is buried on the same cemetery as Vincent van Gogh, a painter he highly admired . 

Corneille was an autodidact. In his early years he painted realistic: still lifes, people and landscapes. In 1948 Corneille was involved in the creation of the CoBrA Group, a group of Danish (Copenhagen), Belgian (Brussels) and Dutch (Amsterdam) artists. Even writers and poets belong to the CoBrA group. The artists' group only existed for three years, but has been very important for Corneille's work. 
According to Corneille, the CoBRA artists want to express themselves on a expressionistic way, like children, by playing open-minded with colours and shapes. Since 1950 Corneille lived and worked in Paris. His paintings are bright and colourful. The sun, women, paradise, trees and birds are recurring elements. He is particularly fond of birds. His artist name Corneille is French for 'crow'.

What to do?
Show examples of Corneille's work. What subjects do you often see in his paintings? What do you notice about his style? Discuss the features: bright colours, thick black outlines, few details, painted as if it was made by a child, an image that sometimes is not complete (missing parts at the edges).
 

In this lesson students have to sketch very briefly (maximum 5 minutes!), to avoid drawing too many details and to force them to work big. Students may  also choose to sketch with a small brush and light yellow paint. This will automatically result in working big with little details. The yellow lines can easily be painted with different colours later.
 
Sketching with yellow paint

Sketch the outline of a cat or bird and make sure this animal reaches at least three edges of the sheet: it should be big! Paint the animal in bright colours and/or patterns. Paint the background too. Leave the work to dry and outline everything using a small brush and black paint. Paint your name in black somewhere at the artwork, like Corneille did. Stick the painting on a coloured sheet.
 
All artworks made by students of 11 years old

zaterdag 4 september 2010

Exercise in colour mixing

You need:

  1. white drawing sheet A3 size
  2. yellow, red and blue tempera paint
  3. brushes
  4. pencil
  5. ruler

Purpose of this lesson to learn students how to make secondary colours. Show Itten's colour circle and discuss it. Tell about primary and secundary colours and show how to make the secundary colours.

Students make a simple drawing on their sheet. In this lesson is chosen for a still life of vases , but you can also opt for houses. After this a 5 cm grid has to be drawn using pencil and ruler. The squares of the objects are painted with primary colours red, yellow and blue; be sure there is never the same color next to each other. The background squares are painted with the secondary colours orange, purple and green. Again: alternate, not the same colour next to each other. To avoid errors, it is useful to write the first letter of the colours in the squares before painting.

dinsdag 24 augustus 2010

A sea of flowers

You need:
  1. white drawing paper A4 size
  2. waterpaint
  3. brushes
  4. jars with water
  5. black permanent marker

A sea of flowers is an expression used for fields with so many flowers, that you can hardly see the end of it. Let children see examples of 'a sea of flowers'. Have you ever seen a sea of flowers yourself? Where or when?

Tell the students they are going to paint a sea of flowers, but literally! Flowers in the water, a lot of them!

Let the children directly paint their flowers, so no pencil drawing first. They use water paint and (lots of) water. Choose different colours and shapes, and paint steals and leaves too. Do not only paint in the middle of the sheet, but also at the edge so you can see half flowers. (If you choose this lesson for a group work, children should make agreements about the places their flowers will come together and the colours of the flowers).

When the flowers are ready, students paint the background with light blue waterpaint. Paint as close as possible along the flowers , but do not touche them to prevent colours from running together. Leave the work to dry. Outline the flowers with a black marker. All spots and white edges are thus concealed.

Paste all works together to create a group work: our sea of flowers!

zondag 22 augustus 2010

Funky flipflops

By Marrit, 11 years old

You need:
  1. two white drawing sheets A4 size
  2. coloured construction paper
  3. two split pens or paper fasteners
  4. scissors
  5. glue
  6. markers
Tear wide strips of the narrow side of a sheet of light blue and a dark blue sheet construction paper. Paste thes over and over and partially overlapping on a white sheet of paper: these are the waves of the sea in which your flipflops will disappear! You can also choose yellow paper and sandpaper, to suggest the beach. Trace your foot on the second white sheet. Cut it twice. Remember that one of them should be a mirror image. Colour the flipflops with bright summer colours.

Cut out of the remaining white paper four strips of about 15 cm long and 1.5 cm wide. Colour these too. Prick a hole in both flip-flops on the spot between the big toe and second toe. Prick holes in the four strips, approximately 0.5 cm from the end. Insert a split pin through the two strips and the slipper. Glue the ends of the strips under the slipper. Paste the flipflops on the sheet with waves.

maandag 12 juli 2010

Sunglasses

You need:
  1. black construction paper A4 size
  2. white drawing sheet
  3. colour pencils or markers
  4. scissors
  5. glue
  6. silver and gold marker

Draw half sunglasses against the fold of a black sheet. Cut the glasses. Draw a summer scene on the white sheet. Colour it. Put the glasses on it and slide until you see the best part. Paste the glasses on the drawing and cut them again. Decorate the glasses with gold or silver marker.

Made by students of 12 years old

zondag 11 juli 2010

The most beautiful soccer ball!

Made by students of 9-10 years old

With the upcoming Worldcup final between Holland and Spain tonight, a nice lesson to draw your own most beautiful soccer ball. You need:
  1. pattern soccer ball (download)
  2. black pencil of black markers
  3. ruler
  4. scissors
  5. glue
  6. coloured paper for background
Most modern footballs are stitched from 32 panels of waterproofed leather or plastic: 12 regular pentagons and 20 regular hexagons. The pentagons are mostly black, the hexagons white.

Give students a copy of the soccer ball. Let them finish the lines using pencil and ruler. Then all surfaces have to be filled with patterns. Students of higher grades can be asked to draw dark patterns for the pentagons and lighter patters for the hexagons. In lower grades you can ask to colour the pentagon in the middle of the ball black, and draw patterns in the other hexagons and pentagons. Cut the ball and paste it on coloured paper. Of course we chose orange!

zaterdag 26 juni 2010

I scream for ice cream

Made by students of grade 1

You need:

  1. coloured cardboard A2 size
  2. brown construction paper
  3. white drawing paper A4 size
  4. tempera paint
  5. brushes
  6. saucers
  7. tissue paper
  8. salt
  9. scissors
  10. gold markers
  11. fiber fill or cotton wool

In this lesson, children use each other's work.

Divide the class into six groups. Give each group of children some white sheets, a saucer, one colour tempera paint, salt, brushes, a jar with water and blotting paper in a slightly darker colour than the paint. Mix tempera on a saucer with a lot of water to get a light (ice cream) colour. Each group paint a few sheets of drawing paper with this diluted tempera. Salt can be applied to create texture and small pieces of blotting paper with water will suggest chocolate chips or fruit in the ice. Be sure there are so many sheets of each colour that every student can get half a sheet of all six colours.

Hang the sheets outside to dry.

Cut the large sheets of coloured cardboard lengthwise into three, so you get three large strips of approximately 15 by 60 cm. Give each child a coloured strip and a sheet of brown construction paper. Each student cuts a cone out the brown craft paper by folding the paper and cutting a triangle from the fold . Then the draw a wafer pattern on the cone with a gold marker.

Give each student half sheet of painted paper of all six colours. Let them draw circles on the sheets by outlining a cup. Cut the circles. Paste the ice-cream cone on the large sheet of cardboard, and paste six different circles on it. Remember that the first scoop of ice cream has to be pasted partly in the cone. Finally cream may be added, by cutting half a circle out of fiberfill or some cotton wool.

donderdag 3 juni 2010

Poppies in the wind

You need:
  1. white drawing paper A4 size
  2. tempera paint
  3. puppies or pictures of puppies
  4. brushes

Poppies are particularly in the United Kingdom, Canada and the U.S. symbol of the First World War because they flourished exuberantly on the battlefields of Flanders. In the famous poem 'In Flanders Fields' those poppies are mentioned. At the English National Remembrance Day, poppy wreaths are laid by the queen. Not real ones actually, because poppy petals fall very quickly. Poppies in the Netherlands have no symbolic value, but they are very nice to paint! View the brought poppies or pictures of them. Discuss the features of the flower: delicate satiny petals and a dark heart that shines through the petals. Because the flowers are very light, you see them always sway in the wind. Students paint some poppies on the upper half of their sheet. Paint the steels with black paint. Draw a frame with a red pencil about 1 cm from the edge. Paste the artwork on a black background.

Artwork made by students of 9-10 years old

dinsdag 18 mei 2010

Op art in complementary colours

You need:
  1. drawing paper 14 by 14 cm
  2. ruler
  3. pencil
  4. piece of cardboard, 6 by cm
  5. markers
  6. black paper for background
  7. scissors
  8. glue

Check during the introduction of this lesson what students already know about primary and secundary colours. What are the primary colours? How do you make secondary colours out of them?

Show a picture of the colour circle and tell about complementary colours: the colours who are opposite to eachother in the colour circle. Blue and orange, yellow and purple, greed and red.

Divide the drawing sheet in four squares of 7 by 7 cm. Cut a shape from a piece of cardboard and trace it four times in the squares. Draw vertical lines with a pencil with 1 cm between them. Colour the shapes and backgrounds like a checkerboard with complementary colours and one in black and white. Cut the squares and paste them on a black sheet.

zondag 16 mei 2010

Colourful chicken

Made by Danjel, 12 years old

You need:
  1. drawing paper A3 size
  2. oil pastel
  3. tempera
  4. brushes
  5. coloured paper for background
Children draw a horizon line on their paper. Then they draw a big chicken, partly below the horizon. They have to colour it with oil pastels in bright colours. Paint the background with diluted tempera paint.

zaterdag 17 april 2010

People like Joan MirĂ³

You need:

  1. drawing paper A4 size
  2. markers
  3. black waterproof marker
  4. coloured paper for background
  5. glue

Joan MirĂ³'s (Spain, 1893-1983) work contains paintings, sculptures, textile works and theatre. His paintings contain many playful and colourful organic forms. in his work you'll see basic colours as blue, green, red, black and yellow. The bright coloured surfaces are bordered or crossed by black lines. The unrealistic shapes, bright colours and lines resemble the work of children. Recurring themes are heavenly bodies and ladders. Many of the images in his paintings have eyes. In this way the work looks for direct eye contact with the one who looks at it.

Show several works of Miro on the digital board. Discuss the striking things: bright colours, many eyes, forms are bordered or crossed with black lines, different lines, different forms.

Tell the students about the difference between geometric forms (forms of mathematics, such as square, circle, triangle, etc) and organic forms (natural forms, free forms) and draw examples of them on the digital board. Discuss different line types and draw them on the board too.

The task is: draw an animal or a human being with waterproof black marker. Don't sketch first, draw directly with the marker! Your figure should consist of organic and / or geometric shapes. Divide large fields in forms or make them smaller with different lines. Colour your drawing with bright colours. Decorate the background with lines, shapes and coloured eyes. Paste the work finally on a coloured background.

All works are made by children of 10-11 years old