woensdag 12 september 2018

Portfolio: Bad Hair Day

You need:
  1. white sheets
  2. liquid watercolor paint
  3. straws
  4. oil pastel crayons
How to draw a face? We used the website Wikihow. Students draw their own face on a large white sheet and color it with oil pastels. Drop liquid water color in several colors above the head and blow it in different directions using straws. 


On the photo our proud third grade students with their portfolio's in which we collected all the artwork of this school year.

donderdag 23 augustus 2018

The very lonely firefly


You need:

  1. black construction paper
  2. tempera paint
  3. brushes
  4. gold and silver markers
  5. pencils
Book: The very lonely firefly from Eric Carle (also to be found on YouTube)

Students use white tempera to paint two or more jars at the bottom of the black sheet. They mix yellow and blue to paint grass in different shades of green over the jars. Draw fire flies with gold and silver markers and color them with pencils. 


donderdag 30 november 2017

Gingerbread man printing lesson

 
You need:
  1. two pieces of linoleum 10 x 10 cm
  2. lino knife
  3. block printing ink
  4. flat piece of plexiglass
  5. linoleum roller
  6. white sheets
  7. lino press
  8. scissors, glue
  9. coloured paper
Draw a gingerbread cookie on both pieces of linoleum. Cut away the outlines of the first linoleum, and the background of the second one. Print in one or two (Christmas) colours and paste on coloured paper.

Christmas carpet


Made by a student of grade 6
You need:
  1. green, red or black construction paper  25 by 25 cm
  2. ruler
  3. pencil
  4. gold or silver marker
  5. red or green marker
Students divide their sheet with ruler and pencil in 25 squares from 5 by 5 cm. In each square they draw a Christmas figure: tree, candy, snowman, skates, mitten, sock, candle etc. These figures have to be coloured , just like a checkerboard: alternately the background is gold/silver or the figure is gold/silver.

donderdag 13 april 2017

Letter doodling

You need:
  1. white drawing sheet A3 size
  2. ruler
  3. pencil
  4. black markers
  5. colored markers or pencils 
Shot pictures of letter doodling and fonts - new and older ones. 
Discuss the pictures. Letters in those alphabets are a kind of family.  How can you see that? What can you say about the lines? Are they fat, thin, curvy or angular? What do you feel seeing those alphabets?

Draw a grid with your students (a lesson about using rulers is always a struggle!). In this lesson there are 2 inches between the lines and a half inch between the letters.

After drawing their grid, students design their own alphabet and trace them with markers.

Artworkds made by students of grade 5

zaterdag 4 maart 2017

Groupwork like Joan Miró

Made by students of grade 3/4

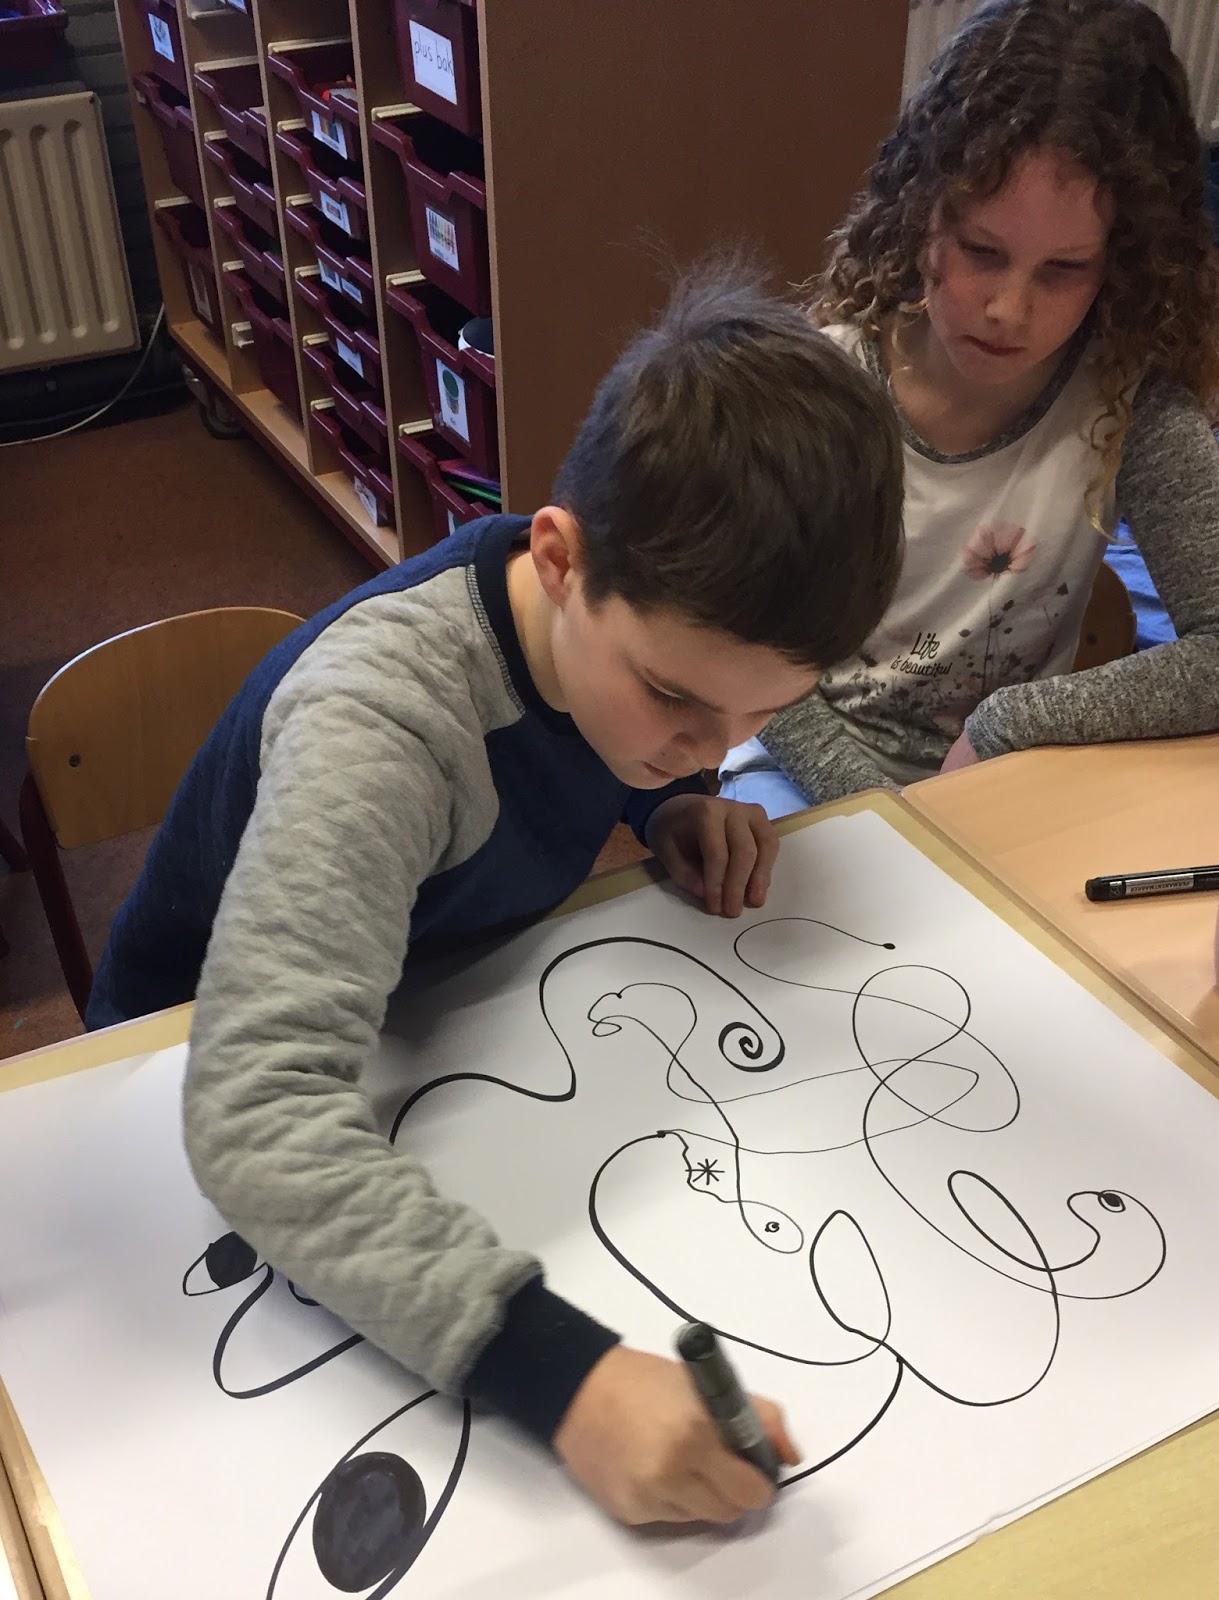
Joan Miró's (Spain, 1893-1983) made paintings, sculptures, textile arts and theater. His paintings contain colorful organic shapes in bright colors: red, blue, yellow, green. The colored surfaces are outlined in black and frequently divided with black lines.

Show some of Miró's artwork. What do you see: bright colors, eyes, shapes outlined in black, divided surfases, stars. Talk about the difference between geometric and organic shapes. Talk about lines: straight, angular, rounded. What do you see in Miró's artwork?

The goal for a group of 4 students is: draw alternately lines on the white sheet with a permanent black marker. Make sure those lines look like Miró. Off course lines may cross! Then draw some elements Miró used too: eyes, stars, divided surfaces etc. Color the artwork. Be sure you're working with 4, so consult each other.

Ready? Sign the work with your personal signature in Miró style!


vrijdag 3 maart 2017

Medieval guild signs


You need:
  1. several materials,  like cardboard or wood 
  2. drawing materials
In the Middle Ages in Europe many artisans and merchants were joined in a guild. A guild was a kind of union for people with the same profession. The guild proposed rules for their members and provided in the exchange of knowledge and experience.
Examples of trade guilds are baker's guild, weaver;s guild, brewers guild or carpenter guilds.
Market vendors and peddlers were members of a merchant's guild. They traded goods such as fabrics, wood and food.


After a lesson about medieval guilds, these guild signs were made. The goal was to create a guild sign on which you can see what guild you're dealing with.


dinsdag 14 februari 2017

Dali's moustache II

Made by a student of grade 1
You need:
  1. colored sheet A4 size
  2. black marker
  3. white sheet A4 size
  4. black crayon
  5. scissors and glue 
  6. pipe cleaner 
More information about Salvador Dalí, see the lesson High legged elephant in the style of Salvador Dali.

Show some surrealistic artworks of Dali and discuss the surrealistic parts of it.  Show The melting clocks. Discuss the shape of the clocks. What happened to these clocks? Are these clocks that you can hang on the wall? Why not? Why do we call this surreal?
Dali's artwork will surprise you. We see realistic parts, complemented with dreams and fantasy.

Dali was an eccentric man. Show som portraits of Dali and look at all those different ways he wears his moustache.

Students write words about surrealism and Dali with a marker on the colored sheet. Then they draw a portrait of him with crayon on a white sheet. Cut it, paste in on the colored sheet. Puncture two holes under the nose and pull the pipe cleaner through. Shape the moustache in a way that Dali would like!

maandag 19 december 2016

Xmas angels

Made by students of grade 3
You need:
  1. white drawing sheet
  2. watercolour paint
  3. brushes 
  4. black marker
  5. glitter 
Outline a saucer on a white sheet and cut it out. Draw an angel. Paint with watercolour paint. Outline with a fine glitter marker. 
Paste the artwork on another circle. 

vrijdag 16 december 2016

Dancing Christmas trees

Made by a student of grade 1
You need:

  1. white drawing sheet
  2. pencil
  3. markers
  4. chalk pastels
Dancing Christmas trees are Christmas trees who look like them only because of the shape (rectangular) and decorations (balls, garlands and stars)! The trunks are much longer than the  the ordinary trees and because of the curves in them it looks they are dancing.  
Draw with pencil, colour with markers, outline with black marker and colour the background with chalk pastels.


woensdag 30 november 2016

Landscape with chalk pastels

Made by students of grade 5

You need:
  1. black construction paper
  2. black oil pastels
  3. soft pastels
  4. hairspray
Show several hillsides and discuss what you see:  light/shadow, depth, overlapping, colours, pointed/rolling. 

Students draw with pencil a simplified hillside on the black sheet. In the blogpost 'Peaks and Valleys' a step by step explanation how to draw this. Give students a maximum of 5 minutes for this part of the lesson, to prevent them of drawing all kinds of details.

Trace the pencil lines with black oil pastel. Colour the hills and sky using chalk pastels. Color and mix, smear and blend until you're satisfied. Be sure the difference can be seen between the light-iluminated parts of the hills and the parts that are in shadow. 
Trace after coloring the black lines again if necessary. Fix the artwork with hairspray. 

maandag 21 november 2016

Tea light holder The Style

Made by a student of grade 4

You need:
  1. black construction paper  41 by 12 cm 
  2. wax paper in red, blue and yellow
  3. cutting mat and cutter
  4. glue
Tell students about art the movement The Style and two of its most famous contributors Piet Mondriaan and Theo van Doesburg. 

Draw 4 lines with 10 cm between them from bottom to the top of the black sheet. The last strip (1 cm) is the glue strip. 
Draw four squares or rectangles on the black sheet. Then draw lines from about 1 cm wide. Cut the spaces between the lines and paste wax paper behind them. 
Finish the lantern by folding the four lines and pasting it. 

maandag 14 november 2016

Moon behind tree

Made by a student of grade 6
You need:
  1. white drawing sheet 
  2. charcoal
  3. chalk pastels 
  4. indian ink
  5. brush 
Use a saucer to draw a moon in the center of the sheet. Colour it with yellow chalk pastel. Colour the rest of the sheet grey using charcoal: around the moon it's brighter than further away.
Draw a branch and paint it with Indian ink.

zaterdag 5 november 2016

Weaving like Mondriaan

Made by a student of grade 2

You need:
  1. white sheet A4 size
  2. colored paper strips in primary colours
  3. scissors
  4. glue
  5. black fineliner 
Fold the white sheet in half.
Cut evenly-spaced slits starting from the folded edge and continuing up to about a half inch from the opposite. Open up the paper.
Take one paper strip and weave it across the slits, going over and under them. Push the strip to the top and start with another one. The second strip should be woven in an opposite pattern as the first one. If the first strip goes over and under across the slits, the second one should go under and over the slits.
Continue weaving until the white sheet is full. Paste the ends of the strips on the white sheet.
Create a frame by pasting the artwork on black construction paper. Draw small patters on the white strips using a fine black marker. 

zondag 30 oktober 2016

Mondriaan collage with printed lines


You need:

  1. paper in primary colours
  2. white sheet A3 size 
  3. pieces of cardboard 
  4. black tempera paint
  5. saucer
  6. ruler 
  7. pencil 
  8. scissors 
Just like Piet Mondriaan (De Stijl), students draw rectangles and squares using ruler and pencil on construction paper in yellow, blue and red.  After this the drawings have to be cut and pasted on a white sheet. However Mondriaan did not: students may stick colours together.  
Stamp straight lines using a piece of ribbed cardboard and black tempera paint. 

Made by a student of grade 3 

Source: http://artroom104.blogspot.nl/ 

vrijdag 14 oktober 2016

Happy monsters

You need:


  1. drawing sheets A3 size
  2. markers
  3. tempera paint

Draw happy monsters! Not the scary types, but the nice ones with big eyes. Color with markers, background with tempera. Outline with black marker.

Made by students of grade 6

vrijdag 24 juni 2016

A day at the beach


Artworks made by students of grade 5

You need:
  1. drawing sheet A3 size
  2. white drawing sheets
  3. tempera paint
  4. brushes
  5. scissors
  6. markers and/or pencils
  7. glue
  8. pencils
Talk about a day at the beach: things (to do) on the sand, things (to do) in the water and things (to do) in the air. Talk about people standing in the water: they seem to have half legs!

Cover four tables with newspaper and put three containers with paint on it:
  • yellow and a little brown besides (beach) + two big brushes
  • blue and a little green (seawater) + two big brushes
  • blue and white (air) + two big brushes 
  • white (surf) + two brushes to stamp
Show how to paint the beach: a lot of yellow on the brush and a little brown for the beach (do not mix!). Do the same with blue and white for the air, and blue with green for the sea. Make wavy motions with the brush to accentuate the water. Finish with a white stamping brush for the surf.
While four students are painting, the others can start with the drawing part of this lesson: draw people and things you see on the beach. Color with markers or color pencils. Cut those little drawings and paste them on the beach, the water or in the air.


donderdag 16 juni 2016

Oscar the Octopus


You need:
  1. drawing sheet A2 size
  2. oilpastels
  3. liquid watercolor paint
  4. jar with water
  5. brushes
  6. salt
After a story about Oscar the Octopus and viewing some pictures of squids, students draw a squid in the sea. Big head, big eyes at the bottom of the head, eight tentacles that go over and under each other. These things should be seen in the drawing.

Color with oil pastels and draw patterns. Be sure the tentacles are going over and under each other - this has to be seen in the patterns.  Outline when necessary with a dark color.
Drip some liquid water color on the background after you made it wet. Sprinkle salt  for a great 'watery' effect.
All artworks are made by students of grade 3

dinsdag 14 juni 2016

Olympic athletes

You need:
  1. scissors
  2. glue
  3. white drawing paper A1 size
  4. cardboard in Olympic colors
  5. compasses
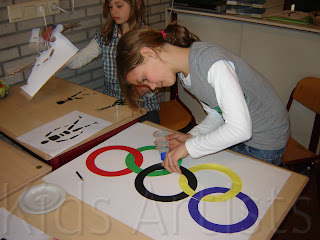
Start this lesson with the symbol of the Olympics: the colored rings. What do these rings mean? What colors do they have? How are they placed together?
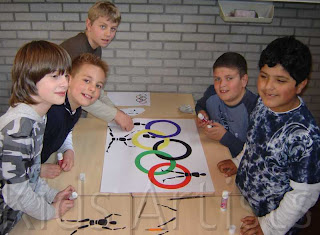
 Ask one or two children to take the position of an athlete. What is the position of the legs, arms and body? Ask another student to show another position and discuss it again.
This is a group work for five students. Every group gets a big white sheet, five sheets of colored cardboard (in the colors of the rings: black, yellow, red, blue and green) and at least five copies of the athlete.
Step one: each group member cuts an Olympic ring, using compasses and scissors. Paste this five rings on the big white sheet. Look carefully which ring has to be pasted in front or back, and which ones have to be pasted through each other. Be sure the little cutting line is pasted underneath another ring.

  Step two: Every student takes a copy of the body and cuts every part of it. Then these bodyparts have to be pasted around, in, behind and in front of the Olympic rings.

zondag 5 juni 2016

Japanese notans


Made by a student of grade 6

You need:
  1. white paper 20 by 20 cm
  2. black paper 10 by 10 cm
  3. scissors
  4. glue
  5. cutter and cutting mat
Show pictures of notans  -  there are symmetrical notans, and also non symmetrical. Some notans are abstract, others are figurative.

Discuss the pictures with the students.
What stands out? Is there symmetry in the picture or not? Is the artwork abstract or figurative? Is there harmony in this notan?

Students make their own notan: figurative or abstract. There shouldn't remain any paper!