woensdag 27 oktober 2021

Autumn birches


You need: 

  1. drawing sheets A3 size
  2. painters tape in several widths
  3. liquid watercolor paint in red, green and yellow in rood, geel en groen
  4. brushes
  5. tempera paint  
  6. stipple brush
  7. old shopping card/customer card
  8. saucers
  9. jars
Choose thick drawing paper,  to avoid ripping when you remove the tape . 

Look at birch trees. What do you see?   
 

  • straight trunks
  • trunks are white
  • horizontal peeling bark banden
  • autumn color leaves: orange, yellow, brown, red
What to do?

Step 1
Palce the sheet on the table with the narrow site down.  Stick strips of tape from top to bottom. Wide for the trunks, narrower for the branches. Note: branches grow up and not down. 


Step 2
Paint the background in strips with diluted liquid watercolor. Let dry. Peel off the tape carefully. 

Step 3
Put some black tempera paint on a saucer. Dip your customer card in the paint. Pull this in several places from left to right (or right to left!) to halfway up the trunk to make the black streaks.

  
Step 4
Spray som warm colors tempera + green on a saucer.  Stipple leaves at the top of the trees using the stipple brush. Do not mix the colors, but use several colors at the brush at the same time.  


Step 5
Hang up! 


Artworks are made by students of grade 1. 

dinsdag 26 oktober 2021

Wire portrait like Alexander Calder

made by teacher Wouter 

During a study day on art education our teachers made portraits of wire. This can also be done in higher grades. If you want to make wire figures in lower grades, then choose a simpler shape, for example fruit/veggies or an animal. 

This activity can be done in a lesson about Alexander Calder, known for his wire portraits and mobiles. 

You need:

  1. 3 meters wire thickness 1,3 mm
  2. wire cutter
  3. printed selfie 30 by 40 cm
  4. black marker
  5. painters tape

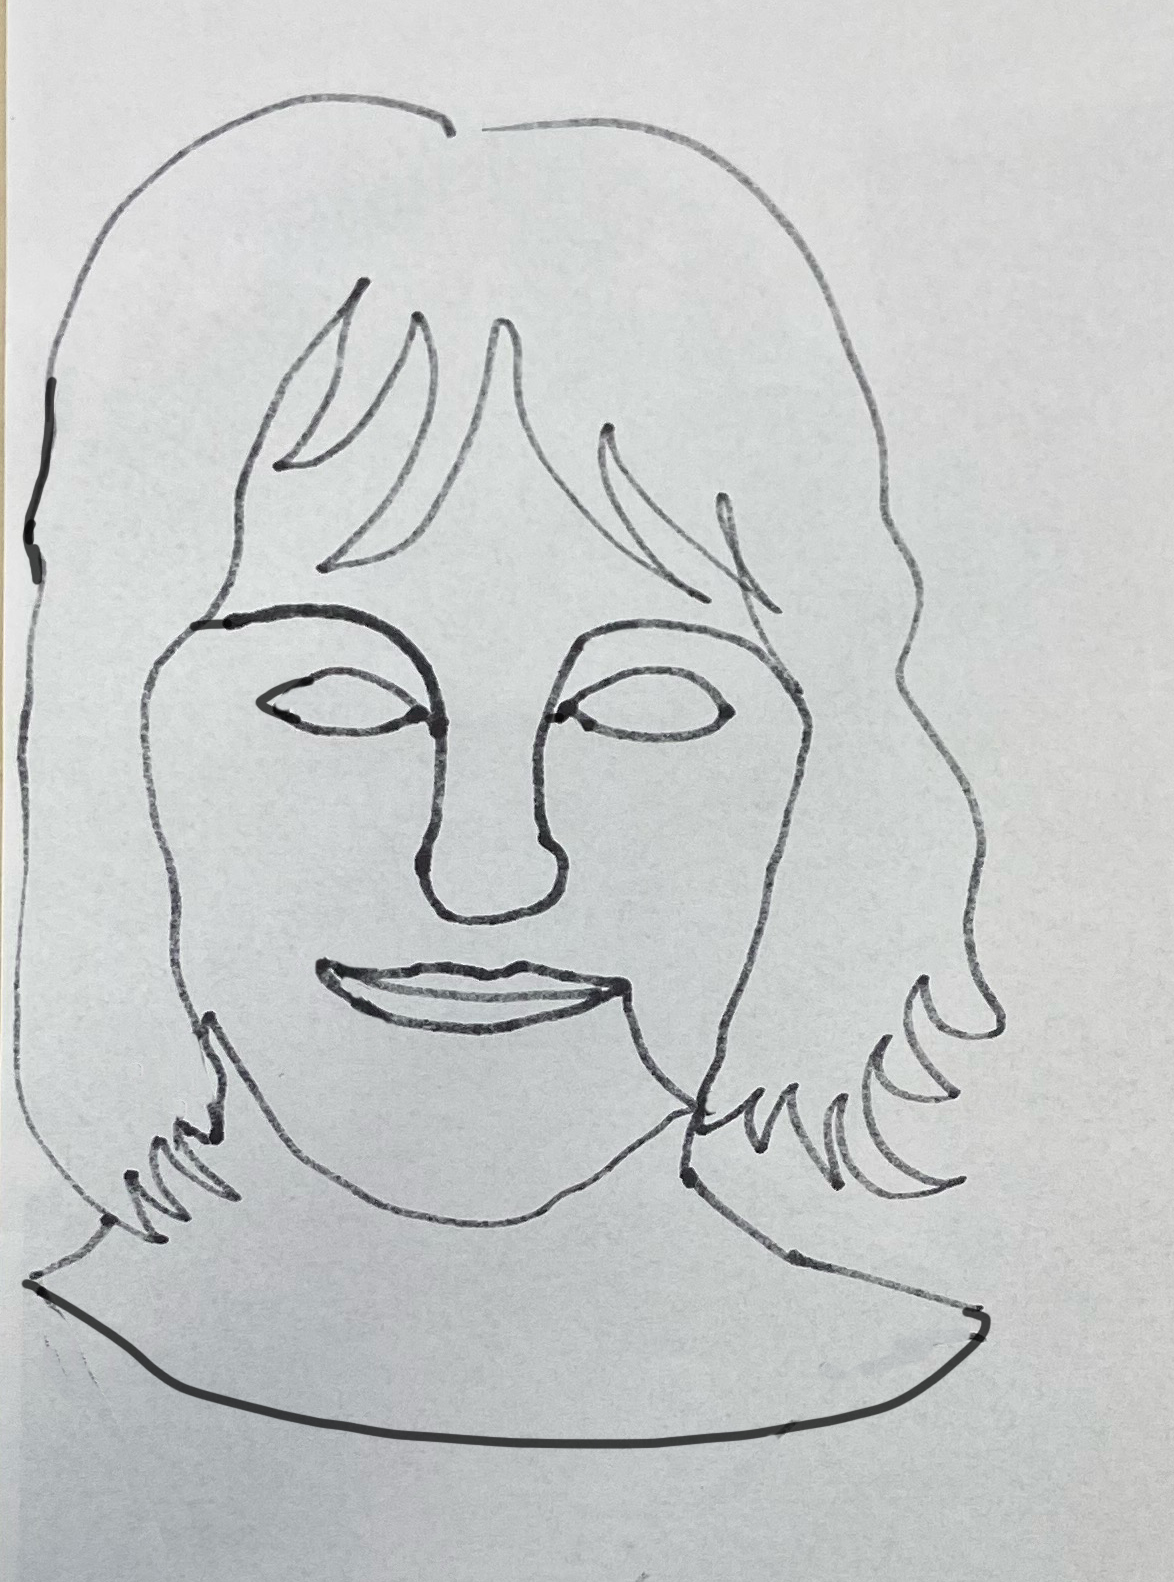
Take a picture of yourself and print it. 

Outline your face, eyes, nose, mouth and hair using the black marker. Turn the sheet over, the lines can be seen on the back of it now.  

Wrap 3 m of wire around your fingers into a bunch. 

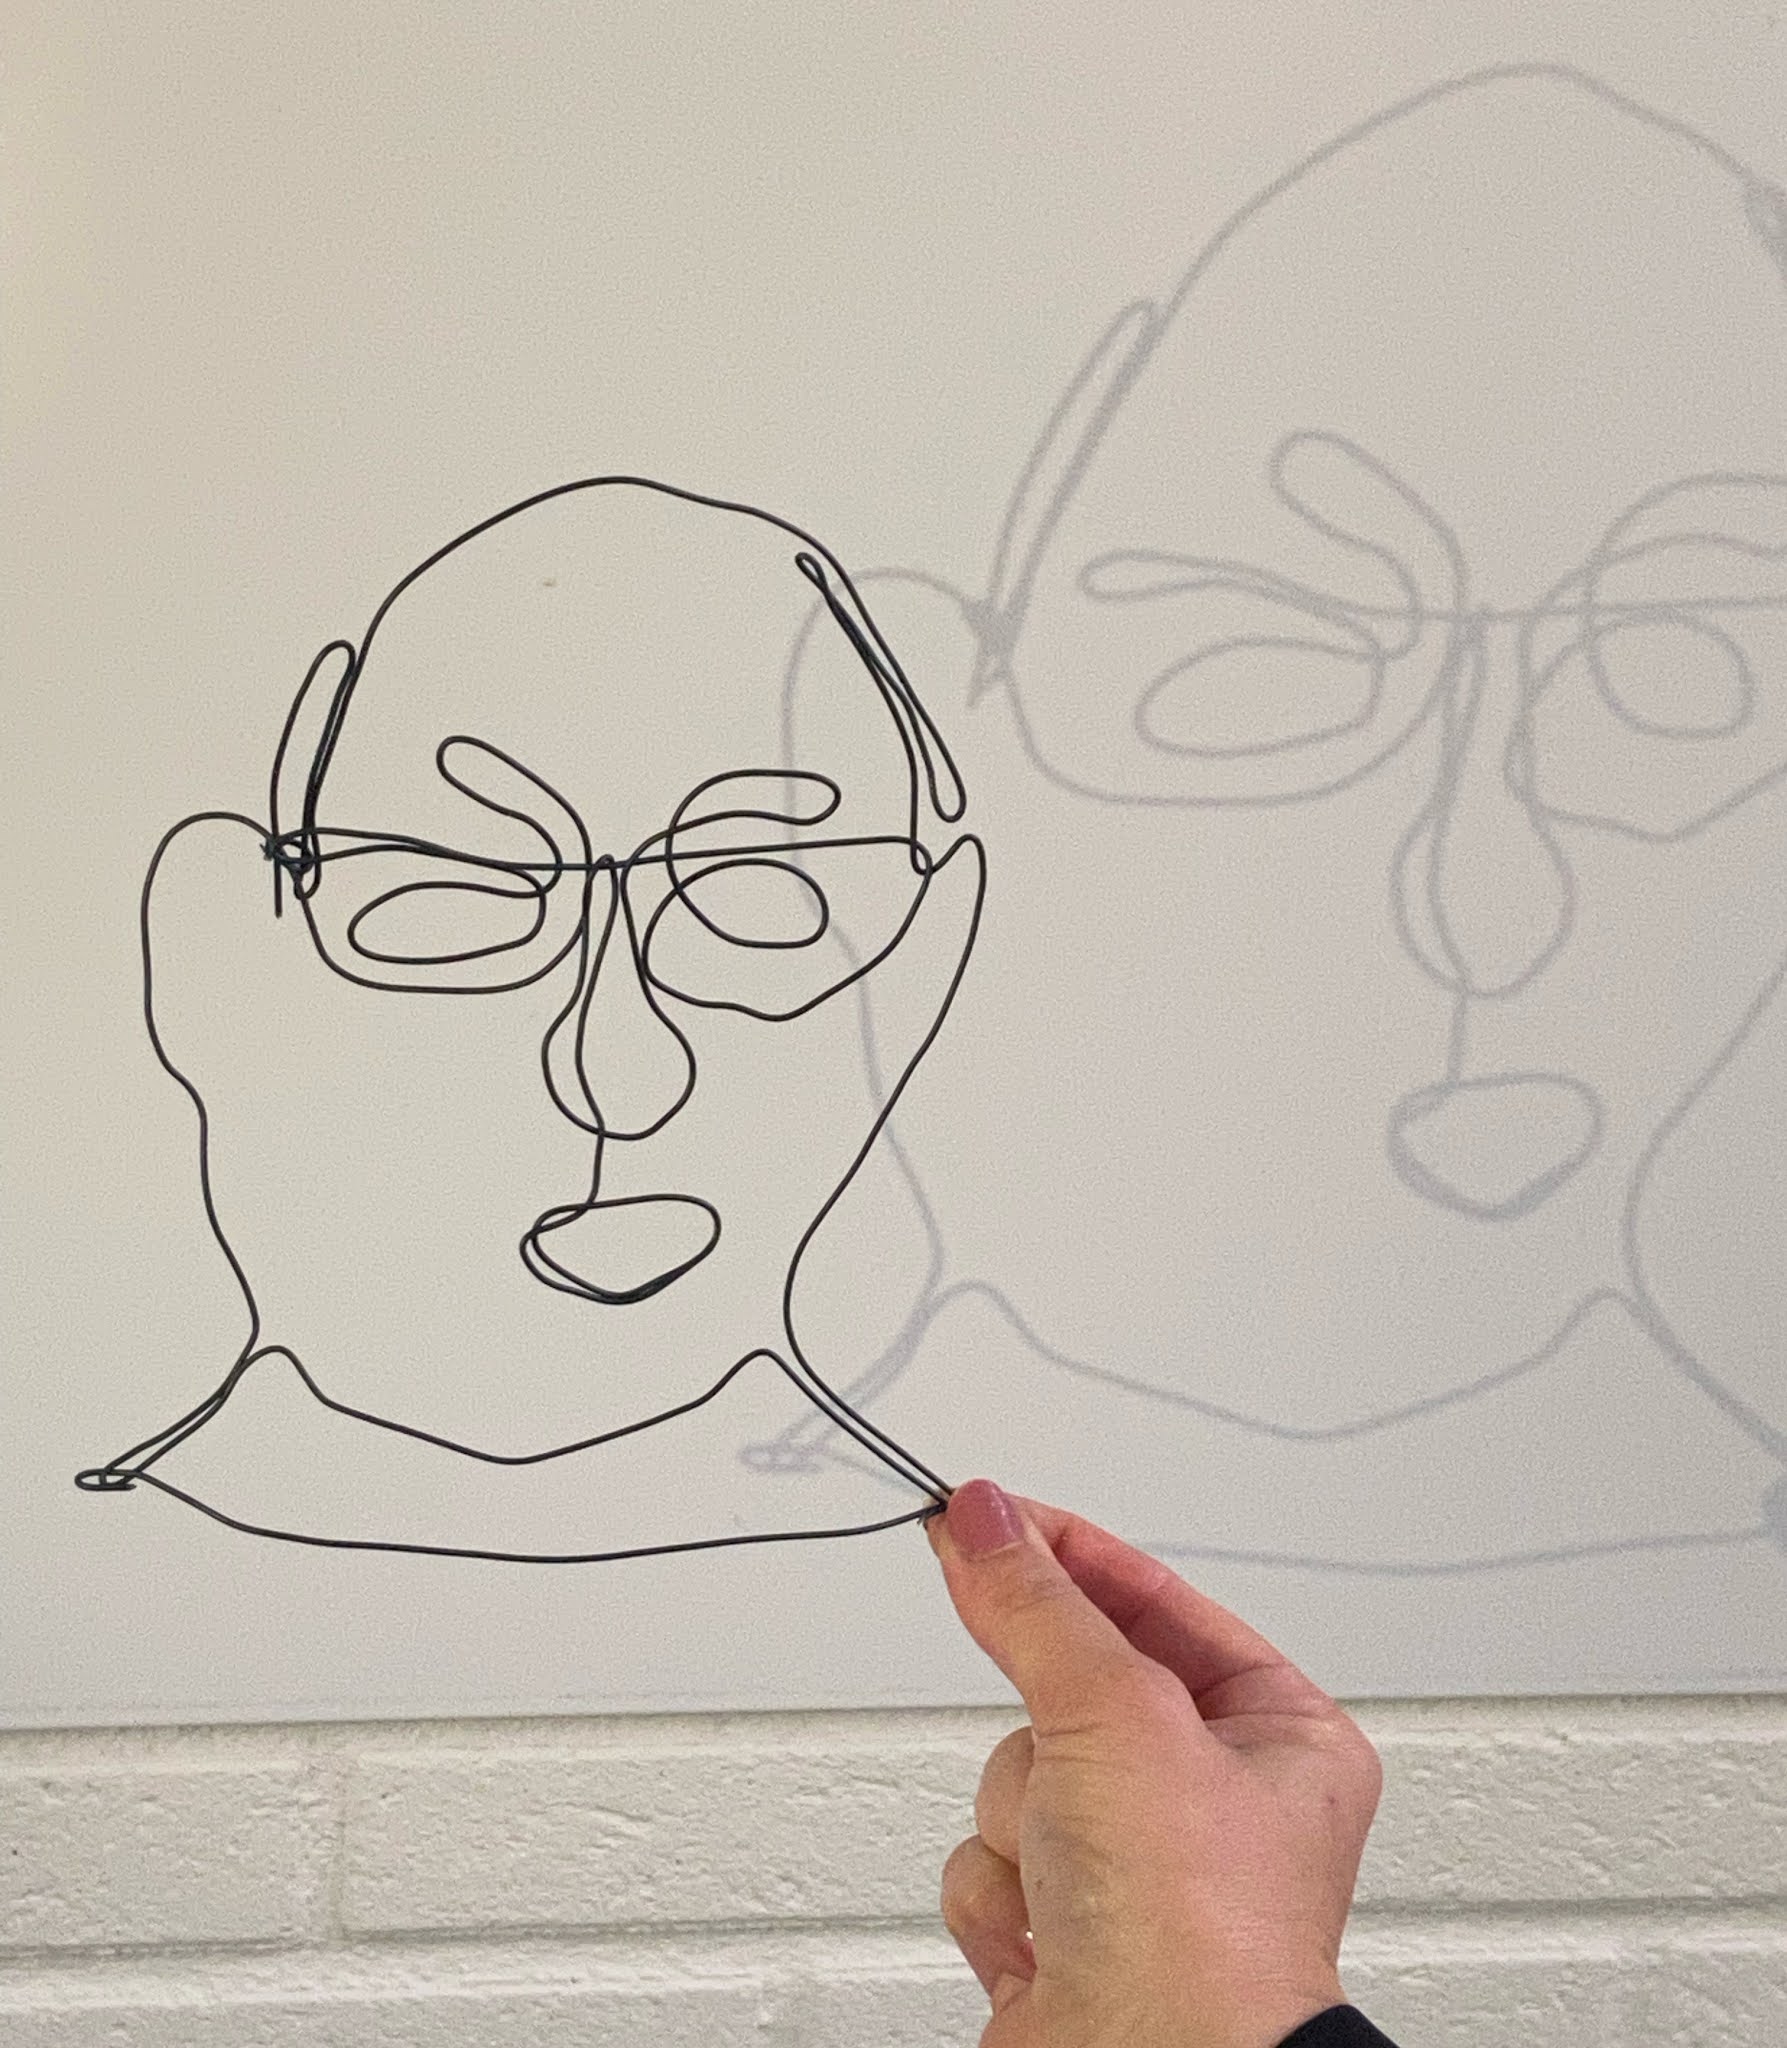
Start at the neck. Lay the wire flat on the photo and follow the lines of your face. Try to lay out the portrait without cutting the wire. If this doesn't work out, you may smuggle by cutting the wire and go on with a new piece. Give the portrait more strength by doubling the wire on some places. Stick the wire now and then on the photo with painters tape. 

Finished? Remove the pieces of tape. Fix the places where wire comes up by making connections with small pieces of wire. See detail photo.  

outline photo with marker

turn over, marker lines have been pushed through

follow the outlines with wire, stick with tape

make stronger

artworks on the table

hang up for beautiful shadows on the wall   

donderdag 21 oktober 2021

Painting with scissors like Matisse

made by students of grade 4

You need per student:

  1. 1 sheet white drawing paper
  2. 1 sheet colored construction paper 
  3. 1 sheet colored construction paper from which you cut 7 cm 
  4. 1 sheet blue construction paper 
  5. leftovers of colored paper
  6. glue
  7. scissors
  8. black marker

Who is Matisse?

Matisse (1869 –1954) was a French artist, known for both his use of colour and his fluid and original draughtsmanship. He was primarily known as a painter.

Matisse didn't care if stones were blue, he just chose the colors he liked. Some people thought is art was very ugly: someone who paints blue faces and green noses is a fool and Matisse was called 'Fauve', which means: wild. This is how the word Fauvism came into being for this art movement, art with bold colors. 

After a surgery Matisse spent the rest of his life in a wheelchair. He wasn't able to paint anymore, but could still paint with his scissors.

View various artworks of Matisse. 


Then few the artwork Oasis. What stands out? 

  • no straigh lines 
  • organic shapes
  • bright colors
  • What is an oasis and why is this artwork called so?  
How to make it 

Step 1
Take the two colored sheets: a whole one and one with 7 cm cut off. Paste the smaller sheet on the large one. The strip at the bottom is the table for the fishbowl. 

Step 2
Cut Matisse shapes and glue them on the small sheet. Let them fall of the sheet and cut away the outer pieces.

Step 3
Fold a white sheet in half on the long side and cut out a fishbowl. The center line of the bowl is the fold of the sheet. Trace around the bowl with a thick black marker.   

Step 4
Cut 'water' out of the blue sheet, slightly smaller than the bowl. Paste it in the bowl. Paste the bowl on the colored sheet with organic shapes. 

Step 5
Cut two or three fishes and some water plants and paste them in the bowl.


Elements of art: shape, color. 


woensdag 20 oktober 2021

One pumpkin, four materials


You need:

  1. drawing sheet
  2. color pencils
  3. watercolor paint
  4. oilpastels
  5. soft pastels
Fold the sheet in four. Draw 4 pumpkins. Color them with different materials.