Posts tonen met het label sports. Alle posts tonen

dinsdag 28 maart 2023

Athletes in motion


You need:

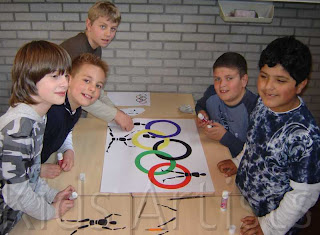
  1. colored construction paper
  2. white drawing sheet 
  3. paperclips
  4. scissors
  5. cutting mat and cutting knife
  6. glue
  7. marker
  8. photo of an athlete 
Print a silhouette of an athlete. Put the colored sheets together with the printed athlete on top. Fix with paper clips. 
Cut out the athlete, and the colored sheets at the same time. Keep moving the paperclips to be sure the four sheets stay together. Use a cutting knife for areas the scissors can't reach.
Make a composition that suggests movement and stick the athletes on the white sheet. Use an marker to fill the background with patterns. 


Thanks to A faithfull attempt for this great lesson. 

dinsdag 14 juni 2016

Olympic athletes

You need:
  1. scissors
  2. glue
  3. white drawing paper A1 size
  4. cardboard in Olympic colors
  5. compasses
Start this lesson with the symbol of the Olympics: the colored rings. What do these rings mean? What colors do they have? How are they placed together? Ask one or two children to take the position of an athlete. What is the position of the legs, arms and body? Ask another student to show another position and discuss it again.
This is a group work for five students. Every group gets a big white sheet, five sheets of colored cardboard (in the colors of the rings: black, yellow, red, blue and green) and at least five copies of the athlete.
Step one: each group member cuts an Olympic ring, using compasses and scissors. Paste this five rings on the big white sheet. Look carefully which ring has to be pasted in front or back, and which ones have to be pasted through each other. Be sure the little cutting line is pasted underneath another ring.

  Step two: Every student takes a copy of the body and cuts every part of it. Then these bodyparts have to be pasted around, in, behind and in front of the Olympic rings.

vrijdag 16 juli 2010

Me and my iPod

You need:

  1. drawing sheet A4 size
  2. compass
  3. colour pencils
  4. black print of a break dancer
  5. white sewing thread
  6. scraps of white paper
  7. scissors
  8. cutter and cutting mat
  9. glue
  10. coloured paper for background

After a dance project, students of our school made these break dancers, listening to their iPods while dancing. Use pencil and ruler to divide the sheet lenghtwise in five compartments. Draw two meandering lines from top to bottom. The sheet is divided in 15 compartments now. Use a compass to draw circles of different sizes at the intersections of the lines. Colour all compartments alternately using two colours. Work top to bottom , to avoid mistakes.

Search the web for a black picture of a breakdancer and print it. Enlarge it on the copymachine until it fits on the drawing sheet. Cut this dancer and paste in on the drawing sheet.

Draw a little rectangle with a circle in it on a scrap of white paper: the iPod. Cut it and paste it in the hand of the dancer. Cut two very tiny circles, the headphones, and paste them on the head.

Cut a piece of sewing thread and make a loop in it. Cut the loop at the top - see picture. Paste the thread around the dancer, leading the two separate pieces to the headphones and the long piece to the iPod. Finally paste the arwork on a coloured background.

Made by students of 11-12 years old

zondag 11 juli 2010

The most beautiful soccer ball!

Made by students of 9-10 years old

With the upcoming Worldcup final between Holland and Spain tonight, a nice lesson to draw your own most beautiful soccer ball. You need:
  1. pattern soccer ball (download)
  2. black pencil of black markers
  3. ruler
  4. scissors
  5. glue
  6. coloured paper for background
Most modern footballs are stitched from 32 panels of waterproofed leather or plastic: 12 regular pentagons and 20 regular hexagons. The pentagons are mostly black, the hexagons white.

Give students a copy of the soccer ball. Let them finish the lines using pencil and ruler. Then all surfaces have to be filled with patterns. Students of higher grades can be asked to draw dark patterns for the pentagons and lighter patters for the hexagons. In lower grades you can ask to colour the pentagon in the middle of the ball black, and draw patterns in the other hexagons and pentagons. Cut the ball and paste it on coloured paper. Of course we chose orange!

woensdag 28 april 2010

Doodle for Google: I love football!

You need:
  1. Google logo
  2. colour pencils
  3. markers

2010 is the year of the World Championship Football in South-Africa. So the Doodle for this year has to be a doodle for football lovers. Several countries, including the Netherlands, can send in their doodles. Price: a trip to South Africa and your doodle for 24 hours on Google sites of participating countries. That's a price all our students wanted to win! Here a few results.

Doodles are made by children of 10-12 years old

zondag 24 januari 2010

Winter scene

I got this lesson from Anneriek Adema. Her students (11-12 years old) made this wonderful winter scenes! You need:
  1. wc role
  2. coloured paper
  3. glue
  4. scissors
  5. polystyrene
  6. wire, sticks etc.

The wc role is the basis for a snowman, skiing person, ice skater or something. Use coloured paper to make a person, and place him on a piece of polystyrene. Use different materials to make an environment.

This lesson can also be used to make a group work. Give every group a larger piece of polystyrene and let them discuss about what they are going to make.

maandag 8 juni 2009

Athletes and their shadows


You need:
  1. plywood plate on A4 size
  2. coping saw
  3. sandpaper
  4. carbon paper
  5. pencil
  6. strong glue
  7. black construction paper for background
  8. tempera and brushes
Search in a newspaper, magazine or on the Internet for a photo of an athlete in motion. Note that, if you would print the photo in black, you'll see well what the athlete does. Place carbon paper with the black side down on your board. Lay the picture above. Trace the athlete. Press firmly. Saw the athlete neat and sand the edges smooth. Paint the two parts in the colours you like. Don't forget the edges! Glue your board on a piece of cardboard and paste the sawn-athletes with some space between. You will see an athlete with his own shadow!