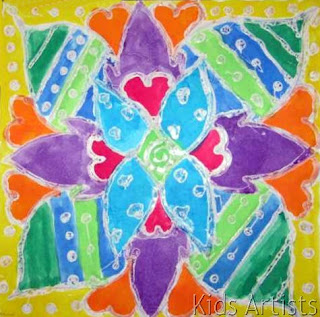
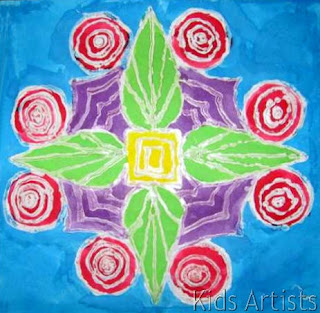
Posts tonen met het label liquid watercolour. Alle posts tonen

zaterdag 26 november 2011

Amsterdam by night

You need:
  1. white drawing sheet A4 size
  2. liquid water colour
  3. brush
  4. jar with water
  5. indian ink
  6. straw
  7. black and yellow construction paper
  8. scissors
  9. glue
Paint the white sheet blue or orange with liquid water colour; add water to get a brighter blue / orange above. Let dry. Drip some indian ink and blow it upwards with a straw. Cut a row of canal houses out of black paper and paste it on the coloured sheet. Cut and paste windows and a moon out of yellow paper.
Paste the artwork on a black sheet.
Artworks made by students of grade 4

zondag 23 oktober 2011

Outlined autumn leaves

Made by a student of grade 5
You need:

  1. white drawing sheet A4 size
  2. liquid water colour yellow and red
  3. brush
  4. colour markers
  5. glue
  6. scissors
Paint a wet white sheet with red and yellow liquid water colour. Leave to dry.  Outline some autumn leaves on this sheet, cut them and paste them on a new sheet.
Choose three markers in wamr (autumn) colours and outline the leaves until the sheet is full. Draw the veins with a fine marker.

dinsdag 11 oktober 2011

Halloween scene


Made by a student of grade 6
You need:
  1. white drawing sheet A4 size
  2. liquid water colour yellow and orange 
  3. brush
  4. jar with water
  5. black markers
  6. black construction paper for backgroud
  7. glue or stapler
This lesson is about silhouettes. A silhouette is a shadow, you can only see the outside lines. Show  some silhouettes or shapes made with your hands. Show that sometimes the light comes through openings in the silhouette, so it is not just black.
Make the drawing sheet wet and paint it yellow and orange with liquid water colour to suggest a sunset. Draw a horizon line. Draw a house or a tree, and draw Halloween things around. Colour the silhouettes black and let light where it can. Paste or staple the artwork on a black sheet.

vrijdag 16 september 2011

Same animal, different colours

Made by a student of grade 1
You need:
  1. two white drawing sheets A4 size
  2. oil pastels
  3. liquid water colour
  4. brush
  5. jar with water
A lesson about cool and warm colours.
Draw an animal on a white drawing sheet. Be sure it's not too small. Ask the teacher to make a copy of this drawing. Colour the first animal with oil pastels in warm colours, the second one in cool colours. Paint the background with liquid water colour, using warm and cool colours as well.
Paste both drawings below or next to each other on a large white sheet. 


maandag 5 september 2011

Swimmer - like David Hockney


I found this terrific lesson on the blog 'Use your coloured pencils' of Anne Farrell. I used this lesson to tell about artist David Hockney and his swimming pool paintings.

You need:
  1. white drawing sheet A4 size
  2. coloured paper for background 
  3. oil pastels
  4. liquid water colour, blue and green
  5. brush
  6. jar with water
The successful British artist David Hockney was born in 1937 in Bradford, England. He studied at the Royal Academy in London. His first works were anecdotal and ironic. In 1964 Hockney moved to California, where he developed a more realistic way of painting. The main themes at this time, are pools, landscapes and portraits.
From 1966 David Hockney increasingly used photographs for his paintings. He made ​​collages containing just photographs. After 1980, Hockney's work became a more expressionistic character. His work shows influences of Picasso Besides paintings, Hockney also makes drawings and etchings. 

Look at artwork of David Hockney, especially those with swimming pools. Discuss with the students how people look like under water - flowing hair, lighter skinWhat causes the shimmering
surfaces on the water and what do they look like?
The students draw one or more people in swimsuits and colour them with oil pastels. Use white oil pastel to draw a water pattern in the background, consisting of wavy horizontal, vertical and diagonal lines.
Paint the picture with blue and/or green diluted coloured ink. The swimmers and the white lines will not resist the ink.
Artworks made by students of grade 4

zondag 21 augustus 2011

Sunflowers in five different materials

You need:
  1. sunflowers or pictures of them
  2. white drawing sheet A1 size, cut in strips of 30 by 65 cm
  3. five different colouring materials, like colour pencils, tempera paint, watercolour paint, oil pastels, crayons, coloured ink, aquarell pencils etc.
  4. brushes
  5. pencil, ruler
  6. coloured paper
  7. scissors
Look with the students at some sunflowers or pictures of them. How thick is the stem, what can you tell about the leaves, how are the petals divided, what colours do you see in the heart of the flower, etc.

Divide the sheet with thin lines into five strips of 13 cm high. Draw some sunflowers. Make sure the flowers themselves are drawn at the demarcation of the strips. Make sure too that in each compartment at least half a sunflower or leave is drawn.
Choose five different colour materials. Use in every compartment a different material. Consider yourself the order of the materials, for example from bright (markers) to less bright (aquarelle pencils).
Paste the work on a coloured background. Or cut the five compartments and paste them with some space between on a coloured background.
Made by students of grade 5

zondag 14 augustus 2011

African adire

Made by a student of grade 4
You need:
  1. white drawing paper A4 size
  2. crayons
  3. liquid watercolour
  4. brush
  5. ruler
  6. pencil
Yoruba women in Nigeria make a type of resist-dyed cloth that they call adire. They make some adire by folding, tying, and/or stitching cloth with raffia before dyeing. This is called adire oniko, after the word for raffia, iko. They also make another type, adire eleko, by painting or stenciling designs on the cloth with starch. Both types are dyed in indigo, a natural blue dye.
The dye-resistant starch can be either painted freehand or stenciled onto the fabric. When freehand painting, the artist usually paints a grid of squares or rectangles onto the fabric first. Then she fills these squares with geometric and representational motifs.
Stenciled patterns are even more diverse. New motifs, both geometric and representational, are constantly being created. They can include everything from simple shapes to elephants, keys, letters, and skyscrapers. The metal stencils are made by men, who sell them to the female adire artists.

Show some pictures of african adire and discuss them. Show African symbols and talk about their meanings.

Students use pencil and ruler to divide their sheets in squares of 5 by 5 cm. Draw with a yellow or white crayon symbols and/or patterns in these squares. Paint the sheet using coloured ink.

zaterdag 5 februari 2011

Patterned hearts like Jim Dine

You need:
  1. drawing sheet A5 size
  2. crayons
  3. liquid water colour
  4. brush

Fold the sheet of paper into quarters. Cut a heart out of a piece in the hearts: Trace this heart four times with a pencil. Draw patterns in the hearts with crayons: stripes, circles, zigzag lines etc. Draw different patterns around the hearts.

Paint the whole sheet with liquid watercolour. The crayon will resist the ink.

zondag 7 november 2010

Fall things

You need:
  1. white drawing sheet 30 by 20 cm
  2. pencil
  3. ruler
  4. crayons
  5. liquid watercolour
  6. brush
  7. jar with water
  8. coloured paper for background
  9. glue
Practice the student's measuring skills by letting them draw a 5 cm grid on the drawing sheet, using a ruler and pencil. Trace the pencil lines with crayons. Draw crayon lines along the outer edges of the paper. Create a pattern of returning autumn drawings in the squares. In this lesson is chosen for diagonal lines. Trace the outlines and details of the drawings with crayon. Paint the drawings and background of the squares with liquid watercolour. Be sure the regular pattern is also to be seen in the colours.. Paste the artwork on a coloured background.

Made by a student of 11 years old

woensdag 3 november 2010

Cool web, big spider

You need:

  1. white drawing paper 20 by 20 cm
  2. left overs of white drawing paper
  3. yellow crayons
  4. liquid watercolour
  5. thick brush
  6. jar with water
  7. scissors
  8. glue
  9. black construction paper

Students draw a web with a yellow crayon. The easiest way is to first draw diagonal lines from the corners of the paper. Then draw more lines from top to bottom, left to right. The lines must all go through the center. After this draw circles around the center, until the sheet is full.

Paint the sheet using liquid watercolour ink in cold colours. Take two colours. Leave the work to dry.

Draw some leaves with a warm colour crayon on a white sheet. Draw the veins. Paint the leaves with warm colours liquid watercolour. Let the leaves dry.

Make a spider of black construction paper. In the example above, the spider is made of a circle with a diameter of about 4 cm. Cut the circle in to the center and stick the cutting edges on each other so the center rises. Draw a cross on the back if you want to. Cut a smaller circle for the head, draw eyes on it and paste it on the body of the spider. Cut the feet: 8 strips of 8 cm by 1/2 cm. Glue the legs on the underside of the body. Make a fold inwards on the mid of the strip, and 1 cm from the end a fold outwards.

When the work is completely dry, cut the leaves and paste them on the web. Put the spider in the web by pasting the lower parts of the legs and the head.

Paste the artwork on a black background. You may draw the spider web lines on the background too.

zondag 10 oktober 2010

Learning letters

Made by a student of 7 years old

You need:
  1. drawing sheet 20 by 20 cm
  2. crayons
  3. liquid watercolour
  4. brushes
  5. jar with water

Draw a 5 cm grid and copy it on drawing sheets. Give every student a grid sheet. Students use crayons to write big handwriting letters in the squares. Trace the lines of the squares with crayon too using one colour. Paint the squares with liquid watercolour.

In Holland we call those letters 'lusletters', 'letters with loops' if I translate is. The first letters children learn, at the same time as they start learning to read, are called 'blokletters'. Block letters?

How do you call those letters? Blockletters? Writing letters? Who can help me?
dinsdag 13 april 2010

Symmetrical flowers

You need:

  1. transparent drying hobby glue
  2. liquid watercolour
  3. brushes
  4. white cardboard cut in squares of 20 by 20 cm
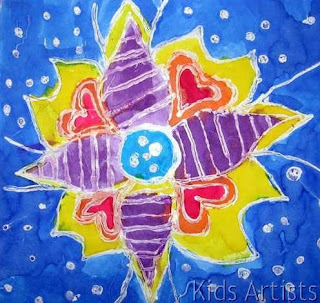
After a short explanation about symmetry, students draw a symmetrical fantasy flower on their cardboard. When ready, the lines have to be traced with glue. After drying (take a day for this), the several flower parts are painted with liquid watercolour. The glue will resist watercolour.

zaterdag 26 december 2009

Fireworks over the city

Made by Oscar, 11 years old
You need:
  1. white drawing paper A3 size
  2. oil pastels
  3. liquid water colour
  4. brushes
  5. coloured paper for background
Children draw a New Years eve in three sections: foreground, middleground and background. At the bottom of the sheet they draw a lot of backs of human heads; these are the people looking to the fireworks. In the middle they draw a street with houses. People are standing in front of those houses, so think about overlapping! The third section is above the houses: beautiful fireworks. Colour everything with oil pastels. Use bright colours for the fireworks, including white. Don't draw too many details, that isn't easy to colour because of the oilpastels. Whey ready, paint the whole drawing with dark liquid watercolour, because new years fireworks are at night! The oil pastels will resist the watercolour.

maandag 14 december 2009

Christmas trees collage

By Silke, 10 years old
I found this idea on Artsonia a collage of Christmas trees coloured with different materials on music paper. You need:
  1. white drawing paper A4 size
  2. different colouring materials, like crayons, oilpastel, watercolour paint, tempera, colour pencils, markers, aquarelle pencils etc.
  3. music paper
  4. chalk pastel
  5. green paper for background
  6. scissors
  7. glue
  8. black marker
Divide different colour materials in your classroom. One place with paint (water paint and tempera paint), one place with crayons and oil pastel, one place with pencils and markers. Children draw three overlapping triangles on a white sheet, the Christmas trees. These trees have to be coloured with different materials and patterns. The only colour they may use is green, in all its nuances. To colour, children have to take place at the table where the material of their choice is. When finished, the trees and patterns have to be outlined with a black marker. The trees (with the black outline) must be cut out. Then kids have to tear pieces of music paper and paste them on a new white sheet. Colour the background with light blue chalk pastel. Do not colour the music paper, just rub the edges with the chalk pastel. Paste the trees on the blue sheet and paste this work on a green background.

This work can also be done as a group work. All trees (or groups of trees) have to be glued then on a large background of music paper.

By children of 10-11 years old

zaterdag 5 december 2009

Tea light holder of paper, ink and oil!

This beautiful coloured light holders are made of just paper, ink and salad oil! You need:
  1. sketch paper
  2. pattern (click on the word to download)
  3. liquid watercolour
  4. great brush
  5. scissors
  6. strong glue
  7. salad oil
  8. paper towels
  9. little glass jar
  10. tea light

Download the pattern of this light holder and copy it on scetch paper. Make the paper wet and leave with a big brush liquid water colour on the sheet. Those drops will flow in the water. Fill the whole sheet with colour. Leave work to dry. Do some salad oil on a plate and take a big brush. Paint the whole sheet with salad oil. Let it dry for one day. The oily sheet can best put between paper towels. Cut out the pattern. Fold the seams and adhesive borders and glue the light holder with strong glue.

zondag 29 november 2009

Ow ow ... owls!

Made by Elaine, 12 years old

You need:

  1. white drawing sheet A4 size
  2. black markers in different sizes
  3. yellow or orange marker
  4. liquid watercolour
  5. brushes
  6. black construction paper
  7. photographs of owls

Discuss with the children characteristics from owls and look at some photographs. Owls have large forward-facing eyes and ear-holes, a hawk-like beak, a flat face, and usually a conspicuous circle of feathers - a facial disc - around each eye. Although owls have binocluar vision, their large eyes are fixed in their sockets, as with other birds, and they must turn their entire head to change views.

Owls are far-sighted, and are unable to see anything clearly within a few inches of their eyes. Their far vision, particularly in low light, is exceptionally good. Owls cannot turn their heads completely backwards. They can turn their head 135 degrees in either direction; they can thus look behind their own shoulders, with a total 270 degree field of view.

Some owls have have ear-tufts on the sides of the head. Those ear-tufts are made of feathers and indicate the status: a grown-up, strong healthy owl with a large territory has large ear-tufts. Young, weak, sick or old owls have smaller ear-tufts. Most owls have a mixture of brown, black, white, and gray feathers. These colours provide camouflage, and so the owls can easily hide.

Made by Charmaine, 11 years old

Children sketch an owl on a branch with pencil, considering the characteristics from owls we talked about before. After this, patterns have to be made in the body parts of the owl, with different sizes of black markers. By making different patterns, those body parts must be recognized. Only the eyes and the beak may be coloured yellow or orange, the rest is black or white.

When finished, the background has to be painted with yellow liquid watercolour. Don't touch the black marker lines if you didn't use a waterproof one, because the black ink will run out then. Stay away about a half centimeter from your drawing. Finally paste the artwork on black construction paper.

Owls, made by children of grade 5

dinsdag 17 november 2009

Owl in moonlight

You need:

  1. white drawing paper A4 size
  2. oil pastel
  3. blue ink
  4. brush
  5. dish with water
  6. scouring pad

See the moon shining through the trees... and in the moonlight everything looks blue.

Children scetch a winter tree, so there will be no leaves. Show them that the branches at the end always be thinner. Scetch a moon between the branches. Draw a cat or an owl on one of those branches.

The tree has to be coloured with blue oil pastel. Color difference can be made by pressing harder or softer, or by using a little black or white through that blue for the feathers. Colour the owl or cat blue too. Use black to draw eyes, ears and beak. The moon is white-yellow and becomes darker yellow to the outside.

When colouring is ready, everything has to be outlined with white oil pastel; even the smallest branches have to be outlined. This is a difficult chore, because you barely see the white and you run the risk that the white crayon will get blue (scrape it then!).

The background will be painted with ink, water and a scouring pad (watch your clothes!). The white lines will resist the ink. Put undiluted blue ink on a dish and dip the soft side of the scouring pad in it. Stamp with the pad along the outer edges of the drawing. Add water to the ink when you're nearer at the moon. The blue will be lighter then. Make a great light blue circle around the moon.

donderdag 21 mei 2009

Spring bulbs

Spring bulbs, by students of grade 2
What spring bulbs do you know? Tulips, daffodils and hyacinths. Maybe you know more spring flowers?
 
You need:
  1. spring bulbs or pictures of them
  2. white drawing paper A4 size
  3. crayons
  4. wash bowl with water
  5. liquid watercolour
  6. brushes
  7. newspapers
  8. coloured paper for background
Draw big flowers and colour them with crayons on a white sheet. When the drawing is finished, place it in the wash bowl. Splash liquid watercolour on the drawing with a brush. The liquid watercolour will run off into the water. Move the sheet, so the colour can spread over the drawing. Because the crayonlines are fat, they will resist the liquid watercolour. Let the drawings dry on a newspaper. Paste the artwork on a coloured background.