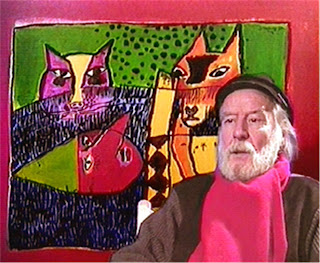
Made by students of grade 6
You need:
- drawing paper A6 size (postcard)
- markers
- fine black marker
- black cardboard
- glue
Group work 'Awesome alphabet'
A site with school-tested lessons for the Arts.
Made by students of grade 6
You need:
Group work 'Awesome alphabet'
Take a digital photo of each student and print in black and white on A4 paper. Students draw on the back of the picture horizontal lines with 2 cm space between them. Cut the lines. Paste the strips with half a cm between the on the coloured paper.
With the name of the student and his birthday under the arwork, this is a nice birthday calendar for in the classroom.
You need:
Draw a line at 12 cm from the bottom of the sheet. Draw some low canal house with a white crayon. Draw windows, treps and doors in them. Paint every house with a different colour of watercolour paint. The crayon will resist the paint and become visible. Paint a simplified reflection of the house under the line. Paint water and air.
Made by a student of 7 years old
You need:Draw a 5 cm grid and copy it on drawing sheets. Give every student a grid sheet. Students use crayons to write big handwriting letters in the squares. Trace the lines of the squares with crayon too using one colour. Paint the squares with liquid watercolour.
In Holland we call those letters 'lusletters', 'letters with loops' if I translate is. The first letters children learn, at the same time as they start learning to read, are called 'blokletters'. Block letters?
How do you call those letters? Blockletters? Writing letters? Who can help me?
Our Dutch calligrams; do you recognize the meaning?
You need:A calligram is a phrase or word in which the typeface, calligraphy or handwriting is arranged in a way that creates a visual image. The image created by the words expresses visually what the word or words say.
Show some calligrams on the smartboard. Discuss them with the students. How was the calligram made? What word(s) do you see? What kind if image is it? Students choose something they want to draw. With a pencil they draw the outlines of it on a sheet. Using a fine marker they write their drawing full with the words that belong to it. Erase the pencil lines when the ink has dried. There are two ways to do it: fill the drawing completely with words, or write the words only on the outlines of the drawing.
Sometimes it is better, and/or nicer, to colour your calligrams. In the example above, the food calligram, you won't probably recognize the food on the plate. With some colour (colour pencils) it is clear! The butterfly is coloured with coloured ink.
You need:
Each student selects a words to illustrate. The design for the word must reflect what the word represents. Someone who doesn't know the meaning of the word, has to understand what it means by looking at the design of it.
Use colour pencils or markers to colour the letters of the word. Use a fine black marker to outline the letters.
Well: although you don't know the meaning of the Dutch words in the examples my students made, you'll know what they mean thanks to the design! If not, they did a bad job?
You need:
This lesson is about lines. What kind of lines do you know? Straight, wavy, curved, bumpy, broken, spiral, zig-zag. Discuss different types of lines and let students draw examples on the blackboard.
Draw with a pencil nine different lines on the black paper with 2 cm between them. Cut the sheet carefully following the lines and place the individual pieces in cut order on the coloured paper. Draw with a pencil on the left and bottom of the colored sheet lines on 1 cm from the side. Paste the first black strip on the coloured sheet against the drawn lines. Paste the other strips with about a half cm space between them against the pencil line left.
When all stripes are pasted, cut at the top and right the excess coloured paper away leaving a frame of 1 cm.
I downloaded a sheet with tumbling blocks on Incompetech, a site full of free downloadable graph papers. Students had to choose three colours markers to colour the blocks. When finished, cut the drawing and paste it on a coloured background.
Made by Maarten, 11 years old
You need:
Help, there are ghosts in my bedroom! Behind the wardrobe, Achter de kast, under the bed, under the rug.... Sketch your room with a pencil: bed, wardrobe, toys, window, door. Draw ghosts on several places. Trace the drawing with indian ink. Leave the ghosts white, and fill the rest of the drawing in with various textures. Look for a lesson on texture at this link: Exercise in drawing texture. Paste the drawing on a black sheet.
Made by Floor, 11 years old
You need:
Picture b.
Draw the half of a face to the red line of the first upper left section and draw the mirror image on the other side of the red line. Choose two colours markers. Colour the facial parts of one half. Colour the background or the other half, leaving the facial parts white. Draw another face in the section below and colour it as written above, but change coloured in white. See picture c.
Picture c.
Finish the drawing and draw as many facial expressions as you know. Colour everything, alternating white and colour as a checkerboard. See picture d.
Picture d.
You need:
Give students a magnifying glass and send them out to look how things increase looking through it. How does a blade of grass look through the magnifier? Or tree bark? Leaves? Flowers? Insects?
For this lesson children draw something from nature. Part of the drawing has to be seen through a magnifying glass. This magnifying glass will actually be drawn too. That what is seen through the magnifying glass, has obviously to be much more detailed as the environment.You need:
Step 1
Give students half A4 sheet of stiff paper. Draw somewhere in the middle of the sheet a square of 5 by 5 cm and cut it out: this is your viewing window. Measure securely! The square doesn't necessarely have to come in the middle of the sheet, because it will only be used as a viewing window.
Step 2
Give students a sheet of white paper and tell them to draw two or three squares of 5 by 5 cm with some space between them. Students can use the mold from step 1, but measuring and drawing may be a good exercise too. (The squares will be cut at the end of the lesson, so the space between them is not so important.)
Detailed pen-and-ink drawing, click to enlarge
Step 3
Now each student has a viewing window and a drawing sheet with two or three squares on it. Give stuents a copy of the detailed house drawing (or search another drawing yourself) and two paperclips. The mission is: search with the viewing window a piece of the drawing you like most. Fix the viewing window with paperclips on the pen drawing and copy that piece as accurately as possible with indian ink in a square on the drawing sheet. Than copy one or two other pieces.
Step 4
Cut the drawings and paste them on one or more layers of coloured cardboard.
Made by children of 11/12 years old
You need:
Tell students about texture: the way something is made, how the surface feels and what structure looks like. Let them feel several textures: the wall, an orange, stuffed animal etc. Discuss how texture can be drawn. A wall is not so difficult, but how do you draw texture in an orange? And how would you draw texture in a stuff animal?
Students draw six squares from 5 by 5 cm on their sheet using a ruler and pencil. Draw with indian ink six different textures in the squares. Cut the squares and make a composition of them on a coloured paper.
You need:
Purpose of this lesson to learn students how to make secondary colours. Show Itten's colour circle and discuss it. Tell about primary and secundary colours and show how to make the secundary colours.
Students make a simple drawing on their sheet. In this lesson is chosen for a still life of vases , but you can also opt for houses. After this a 5 cm grid has to be drawn using pencil and ruler. The squares of the objects are painted with primary colours red, yellow and blue; be sure there is never the same color next to each other. The background squares are painted with the secondary colours orange, purple and green. Again: alternate, not the same colour next to each other. To avoid errors, it is useful to write the first letter of the colours in the squares before painting.
Then draw five wavy lines from top to bottom.
Draw a cross of slightly wavy lines in each square.Choose three colours and colour the triangles: one colour for the bottom triangles of the squares, another colour for the left triangles and a third colour for the triangles on the right. The upper triangle in a square is always white. This is the foamy head of the wave!
Cut a slightly wavy line on the left, right and bottom of the drawing. Cut a strip of the upper triangles away. Paste the work 'wavy' on a coloured sheet.
You need:
This is a great lesson for the beginning of the school: a name tag in the style of painter Paul Klee. This drawing can also be used for the birthday calendar that each group makes at the beginning of the school year.
Paul Klee
Paul Klee (1879 – 1940) is a German/Swiss painter. His work belongs to the modern art. Klee developed mainly as an autodidact and left more than 9000 artworks. In 1912 he saw the work of Picasso and Malevich, and he met Robert Delaunay, who believed colour is the most important element in a painting. After a trip to Tunisia in 1914 Klee started to paint more colorful and abstract. He painted many subjects : landscapes, portraits, animals, mythology, mysterious machines. In his work he combined abstract and figurative shapes. Klee 's work cannot be described in one single word. Surrealism, cubism, abstraction are terms which are applicable to his paintings. He is classified by expressionism. (Source: Wikipedia)
Lesson
Show some artworks of Paul Klee and discuss them. What do you see? Wat zie je? What does strike you? Show finally the work 'Blue Night' and discuss this. Is this like the other works you 've seen? Do you recognize the painting style? What colours are used in Blue Night? How do we call those colours? Students have to make a drawing in Paul Klee style. Divide the sheets of paper. The sheet must be up with the short side. Using a gray pencil and ruler students divide the sheet into three strips of 5 to 21 cm.
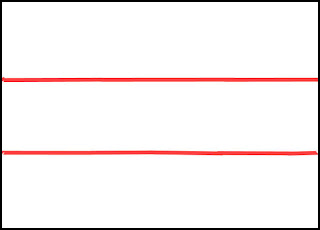
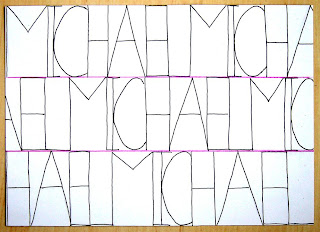
Starting top left, write the first letter of your name in capital. The letter must be 5 cm high and touch the first line and the side and top of the sheet. Write the second letter. Be sure the second letter hits the first one, as well as the writing line and the top of the sheet. Do the same with the rest of the letters of your name. If you're ready with your name, start over again.Writing lines are pink in this example. Click to enlarge.
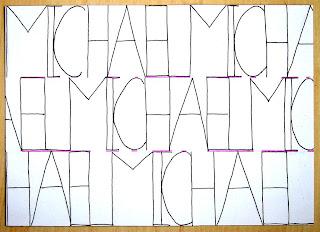
Proceed on the second line and make sure the letters touch the top of the first line. The third line goes the same way, but the letters should touch the bottom of the sheet and the letters on the second line. See example above. Use an eraser to remove the writing lines. Beware: the letters must stay! So: with an E the bottom line is part of the letter, and should therefore not be erased.The writing lines are erased. Click to enlarge.
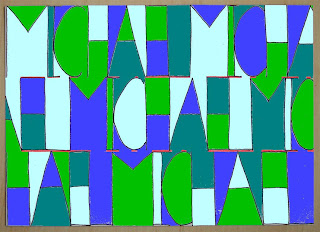
Choose four colours markers. Colour the white spots who are completely surrounded by lines. This might be small spots from the letters, but they could be tall as well because of open letters. Make sure won't get twice the same color side by side. You can prevent this by colouring from top to bottom or from left to right. Choose cool colours just like Klee, or let the kids choose themselves. Just four colours!Four colours. Example is made with Paintshop. Click to enlarge.
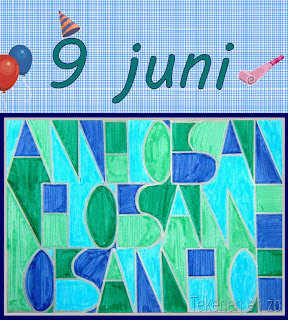
When it is finished, outline with a thick marker. In this example is chosen for silver, because it fits well with the cold colours of the work. To make a birthday calendar for the class, the work has to be pasted on a calendar sheet. This can be drawn, but can also be made on the computer as shown below.A sea of flowers is an expression used for fields with so many flowers, that you can hardly see the end of it. Let children see examples of 'a sea of flowers'. Have you ever seen a sea of flowers yourself? Where or when?
Tell the students they are going to paint a sea of flowers, but literally! Flowers in the water, a lot of them!
Let the children directly paint their flowers, so no pencil drawing first. They use water paint and (lots of) water. Choose different colours and shapes, and paint steals and leaves too. Do not only paint in the middle of the sheet, but also at the edge so you can see half flowers. (If you choose this lesson for a group work, children should make agreements about the places their flowers will come together and the colours of the flowers).
When the flowers are ready, students paint the background with light blue waterpaint. Paint as close as possible along the flowers , but do not touche them to prevent colours from running together. Leave the work to dry. Outline the flowers with a black marker. All spots and white edges are thus concealed.
Paste all works together to create a group work: our sea of flowers!