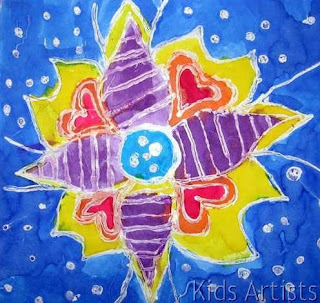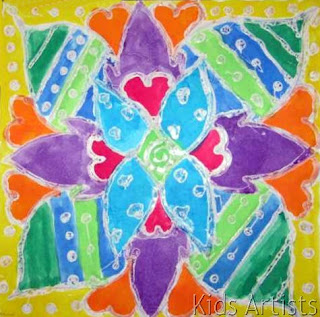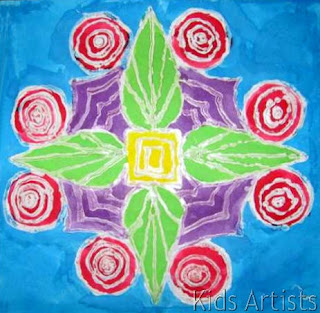


You need:
- transparent drying hobby glue
- liquid watercolour
- brushes
- white cardboard cut in squares of 20 by 20 cm
A site with school-tested lessons for the Arts.


You need:
You need:
The English photographer Carl Warner (click on this link and amaze yoourself!') is known for his terrific photos of landscapes who are made of food. Warner is born in Liverpool in 1963. He draws from childhood, creating imaginary worlds inspired on the artwork of Salvador Dali, Patrick Woodroofe and Roger Dean. Warner went to art academy to become an illustrator, but he realized soon that he could achieve his ideas better and faster by using photography. First he photographed landscapes, still lifes and people. Then he entered the world of advertising. He now designs and photographs food landscapes ('foodscapes') for companies in the food industry.
The ‘Foodscapes’ are made in Warner's studio in London. Warner works together with a stylist to search for the right food and to make the exposure and composition of the stuff. He works with layers, from background to foreground. Each element is then put together in post production to achieve the final image. “I tend to draw a very conventional landscape using classic compositional techniques as I need to fool the viewer into thinking it is a real scene at first glance, it is the realisation that the scene is in fact made of food that brings a smile that brings a smile to the viewer, and for me that’s the best part.”
Show several photo's of Warner's foodscapes on the digital board. Discuss those photo's: what do you see? What food do you recognize? Look especially to the photo with the rising sun: what food is used to suggest the sea? How come we sea salmon as the sea? What is the beach made of? And the mountains? After this children are going to make their own foodscape in the style of Carl Warner. Thye search for food in magazines and cut it out. Encourage children to consult each other. Sometimes you don't see anything special in a photograph, while your neighbour sees an interesting part of a landscape! Place the cut out parts on the sheet and slide it until you are satisfied and then paste all parts.All work is made by students of 11-12 years old
In this lesson one point perspective is combined with an optical illusion.
Place the paper horizontally. Draw a small dot on the right side of the sheet, about half way. Take a ruler and draw five lines from the dot to the left side of the sheet.Draw five lines from the dot to the top of the paper and five lines to the bottom. Use a compass to draw increasing circles around the dot until the sheet is full. Draw your name in blockletters between the lines; use the width of three blocks. Make the letters threedimensional by drawing shadows on the left sides and undersides. Colour the front of the letters. Colour the shadows with a darker colour. Colour the blocks alternately with two colours, like a checker board. You may also use one colour and leave the resting blocks white. Outline the letters with a fine marker to be sure letters will really pop out of the sheet.
Made by students of grade 6
You need:
Draw a frame of 1 cm around the drawing sheet. Draw within this frame six squares of 9 by 9 cm, with 1 cm between the squares. Draw a cartoonlike piece of fruit or vegetables on the cardboard and cut it out. Trace it in the six squares. Colour the fruit or veggies with colour pencils or markers. To make the fruit pop out of the paper, the backgrounds have to be drawn with a fine black marker in different patterns in.
A familiar picture for the teacher: you do your best to teach an interesting lesson, while the students stare dreaming out the window. What they see might not be so interesting: a street where every now and again a car passes or some boring buildings. Use your imagination! What would you like to see when you look out the school window? What does your daydream land look like? Do you see flying pigs? Are there popstars waving at you? Is there an airplane flying through the streets? Draw it! Colour your drawing with markers and outline it with a fine black marker. Colour the background with chalk pastel and fix it with hairspray. Cut strips in the colours of the window frames of the school and paste them on your drawing. Hello, daydreamland!
Made by Kim, 11 years old
You need:By children of 7-8 years old
You need:
The book 'Rainbow Fish' is translated in Dutch as 'The most beautiful fish in the sea'. That's why I called this lesson this way.
Ask two or three children to paint the background for this group project. In this project the backgrounds are painted by children of 12 years old. Paint one or two A1 sized sheets with diluted tempera paint in several colours blue and green. Sprinkle salt on it when the paint is still wet. Let dry. Staple the two sheets together.
Read o r tell the story of the Rainbow Fish, written by Marcus Pfister. The story tells of a fish with shiny, multi-colored scales. He is always fond of his scales. But one day, a small fish asks him if he could have one. Rainbow Fish refuses in a very rude way. The other fish are really upset about his behaviour and don't want anymore to play with him.
Feeling upset, his only friend left, the starfish, tells him to go visit the mysterious octopus for advice. Rainbow Fish finds the octopus and asks what he should do. The octopus tells him that he should share the beauty of his scales with his friends.
When he encounters the small fish a second time, the Rainbow Fish gives him one of his precious scales. Seeing the joy of this little fish, Rainbow Fish feels immediately much better. Very soon Rainbow Fish is surrounded by other fish requesting scales and he gives to each of them one of his shiny scales.
Children get a copy of the Rainbow Fish; of course children can draw their own fishe too. After drawing scales in it, they have to colour their fish with markers. Tell them to leave one scale white: Rainbow Fish will give his scale, a beautiful glittered one.
Cut the fish. Paste all fishes on the blue painted cardboard.
Trace the chicken within the six squares. Colour the chicken, wing and background with patterns in black. Colour the beak and comb with red. Paste the chickens on a red background and decorate the edges with white eggs.
Made by Felix, 11 years old
You need:The children search the Internet for a picture of a skeleton of an animal. It has to be an image in which the various components are to be seen. The higher the resolution, the larger the picture is and clearer it will be. Print this pictures. Then the students search the Latin name of the animal and write it down.
Children draw the skeleton of the animal with a pencil on black paper. This requires them to study the skeleton carefully. Then the individual elements of the skeleton have to be painted with undiluted white paint and a small brush. Any errors can be corrected later with black paint. The Latin name next to it (with brush, or if this is to difficult with a white pencil), will make the artwork complete.
Paste the black sheet on a white background and let the students decorate the edges, for example with bones or footsteps.
Made by Tanita, 11 years old
You need:
Use carbon paper to copy the pattern on the cardboard. Cut the grey parts away. Paste tissue paper on the backside. Hang your bunny in the window.
You need:
Tell about Andy Warhol and show some of his artwork.
Divide the sheet in six rectangles from 7 by 7 cm. Draw a chicken on cardboard and cut it out. Trace it six times. Colour everyting with markers in bright colours. Outline tall parts with a fine black marker. Draw legs and eyes.
Made by Sander, 12 years old
You need:
Talk about the work of the plumber. View the pipes under a sink: how are the pipes connected, how are curves made? Talk about the horrible things a plumber may encounter: leaking pipes, filthy creatures, smelly sludge. Imagine with the class on a sewer pipe system which is inhabited by creepy creatures.
How do you draw a pipe? How can you show that a pipe is round? Where is the light part and where are the shadows? Show this on the blackboard. Children draw 'A plumber's nightmare' according to their own imagination. Leave the pipes white, make shadows with pencil lines. Outline evertything with a fine black marker. These drawing can also be done by a group. This requires the students to make agreements on connecting the pipes at each drawing.
Made by students of 11-12 years old
You need:
Mady by Evelina, 11 years old
You need:You need:
Every child gets a strip white drawing paper (A2 size, cut lengthwise in three parts). Fingerpaint your own flower. Realistic or not, it's all right. The only restriction: the stalk and leaves must be green. The flower should be as high as the sheet.
Cut the flower leaving a white edge from about 0,5 cm. Paste all flowers on a coloured background. Cut a strip of grass from crepe paper and paste this in front of the flowers.You need:
Made by Lotte, 10 years old
You need:Talk about food. What do you like most? What is healthy food? Why do we have to eat vegetables and fruit? What about burgers and fries? Talk about china and cutlery and how a table has to be set.
Draw the meal you like most. Draw everything from above; so a glass is just a circle. Draw your plate with food, a saucer, a glass, knive, spoon, fork and colour everything with colour pencil. Then cut out all parts. Paint a sheet with a pattern and colours that fits to your china; your placemat. You may also use coloured paper and glue to decorate your placemat. When your placemat is ready, paste all cut-out parts on it.
Made by children from 10-11 years old
Typical of Noir are bright coloured profiles, reduced to an icon with a big nose, thick lips and saucer-like eyes.
The East Side Gallery (see photo) is a 1.3 km long section of the wall near the center of Berlin and probably the largest open air gallery in the world. Here you'll find the work of Thierry Noir. After looking at pictures of the work of Thierry Noir, children have to get heads in the style of Noir. hoofden tekenen in de stijl van Noir: profile heads looking to the right or left. The sheet has to be filled completely. Choose three colours marker. Outline everything with a thick black marker. Colour the remaining white parts with another colour or fill the spaces with a pattern in thin marker.Print from photograph, made at Dumpr
Show some drawings in the classroom. How do you recognize the student? What are the most important parts of the face? What lines are important? Every student gets his own drawing. The trace the most important lines in their drawing using a fine black marker. Do not trace details, because after this they have to trace with thick markers. This means: don't trace hairs, just the contours of them. Don't forget facial lines around the mound or nose. When tracing is ready, students take their drawing and a new drawing sheet to a window (or use lightboxes if you have these). Keep the drawing against the window with the white sheet one it and trace the drawing with a pencil. Go back to the table and look carefully at your own portrait. Is it you? Are the lines well? Are the eyes correct?
Take a thick black marker and trace the pencil drawing. Paint the portrait with watercolour paint. Choose the colours you like; in popart every colour is possible!Paint a background or choose a wallpaper background and paste your cut portrait on it. Paste a coloured background behind it for strength.