Wednesday, September 12, 2018

Portfolio: Bad Hair Day

You need:
  1. white sheets
  2. liquid watercolor paint
  3. straws
  4. oil pastel crayons
How to draw a face? We used the website Wikihow. Students draw their own face on a large white sheet and color it with oil pastels. Drop liquid water color in several colors above the head and blow it in different directions using straws. 


On the photo our proud third grade students with their portfolio's in which we collected all the artwork of this school year.

Thursday, November 30, 2017

Christmas carpet


Made by a student of grade 6
You need:
  1. green, red or black construction paper  25 by 25 cm
  2. ruler
  3. pencil
  4. gold or silver marker
  5. red or green marker
Students divide their sheet with ruler and pencil in 25 squares from 5 by 5 cm. In each square they draw a Christmas figure: tree, candy, snowman, skates, mitten, sock, candle etc. These figures have to be coloured , just like a checkerboard: alternately the background is gold/silver or the figure is gold/silver.

Thursday, April 13, 2017

Letter doodling

You need:
  1. white drawing sheet A3 size
  2. ruler
  3. pencil
  4. black markers
  5. colored markers or pencils 
Shot pictures of letter doodling and fonts - new and older ones. 
Discuss the pictures. Letters in those alphabets are a kind of family.  How can you see that? What can you say about the lines? Are they fat, thin, curvy or angular? What do you feel seeing those alphabets?

Draw a grid with your students (a lesson about using rulers is always a struggle!). In this lesson there are 2 inches between the lines and a half inch between the letters.

After drawing their grid, students design their own alphabet and trace them with markers.

Artworkds made by students of grade 5

Saturday, March 4, 2017

Groupwork like Joan Miró

Made by students of grade 3/4

Joan Miró's (Spain, 1893-1983) made paintings, sculptures, textile arts and theater. His paintings contain colorful organic shapes in bright colors: red, blue, yellow, green. The colored surfaces are outlined in black and frequently divided with black lines.

Show some of Miró's artwork. What do you see: bright colors, eyes, shapes outlined in black, divided surfases, stars. Talk about the difference between geometric and organic shapes. Talk about lines: straight, angular, rounded. What do you see in Miró's artwork?

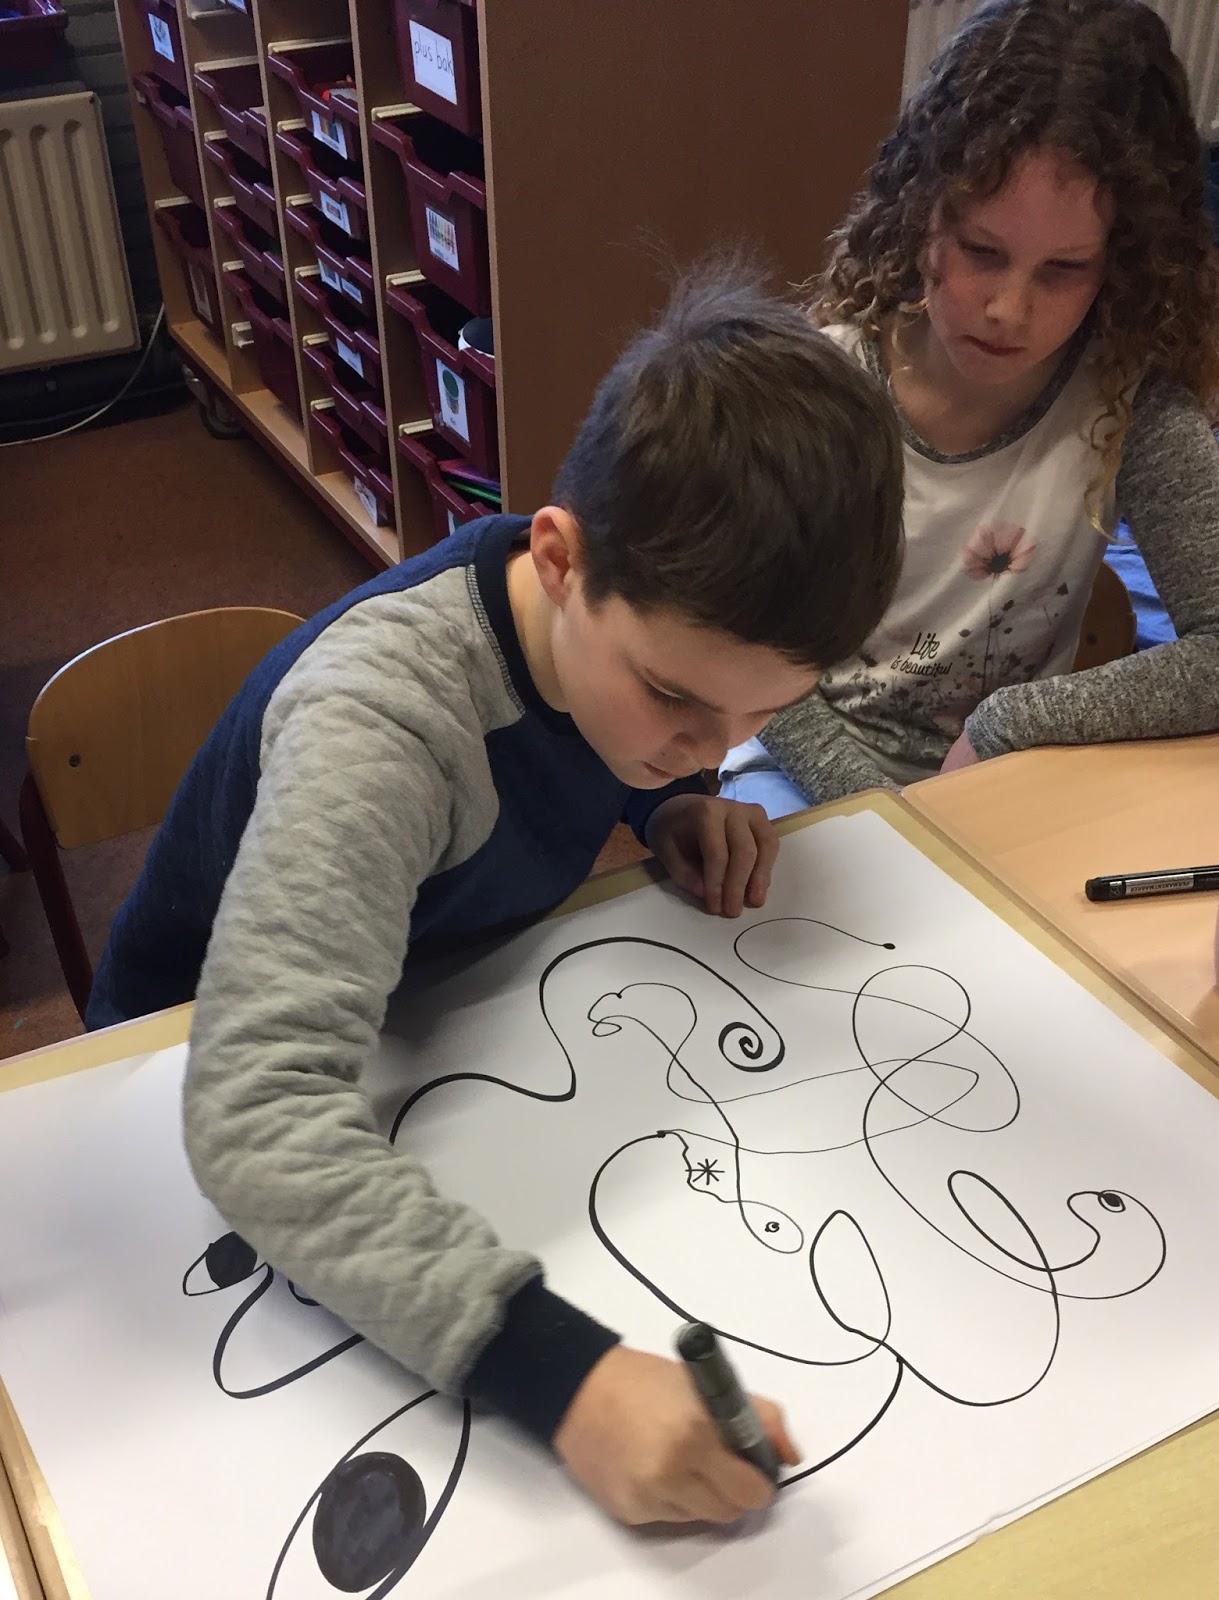
The goal for a group of 4 students is: draw alternately lines on the white sheet with a permanent black marker. Make sure those lines look like Miró. Off course lines may cross! Then draw some elements Miró used too: eyes, stars, divided surfaces etc. Color the artwork. Be sure you're working with 4, so consult each other.

Ready? Sign the work with your personal signature in Miró style!


Friday, March 3, 2017

Medieval guild signs


You need:
  1. several materials,  like cardboard or wood 
  2. drawing materials
In the Middle Ages in Europe many artisans and merchants were joined in a guild. A guild was a kind of union for people with the same profession. The guild proposed rules for their members and provided in the exchange of knowledge and experience.
Examples of trade guilds are baker's guild, weaver;s guild, brewers guild or carpenter guilds.
Market vendors and peddlers were members of a merchant's guild. They traded goods such as fabrics, wood and food.


After a lesson about medieval guilds, these guild signs were made. The goal was to create a guild sign on which you can see what guild you're dealing with.


Friday, December 16, 2016

Dancing Christmas trees

Made by a student of grade 1
You need:

  1. white drawing sheet
  2. pencil
  3. markers
  4. chalk pastels
Dancing Christmas trees are Christmas trees who look like them only because of the shape (rectangular) and decorations (balls, garlands and stars)! The trunks are much longer than the  the ordinary trees and because of the curves in them it looks they are dancing.  
Draw with pencil, colour with markers, outline with black marker and colour the background with chalk pastels.


Wednesday, November 30, 2016

Landscape with chalk pastels

Made by students of grade 5

You need:
  1. black construction paper
  2. black oil pastels
  3. soft pastels
  4. hairspray
Show several hillsides and discuss what you see:  light/shadow, depth, overlapping, colours, pointed/rolling. 

Students draw with pencil a simplified hillside on the black sheet. In the blogpost 'Peaks and Valleys' a step by step explanation how to draw this. Give students a maximum of 5 minutes for this part of the lesson, to prevent them of drawing all kinds of details.

Trace the pencil lines with black oil pastel. Colour the hills and sky using chalk pastels. Color and mix, smear and blend until you're satisfied. Be sure the difference can be seen between the light-iluminated parts of the hills and the parts that are in shadow. 
Trace after coloring the black lines again if necessary. Fix the artwork with hairspray. 

Monday, November 21, 2016

Tea light holder The Style

Made by a student of grade 4

You need:
  1. black construction paper  41 by 12 cm 
  2. wax paper in red, blue and yellow
  3. cutting mat and cutter
  4. glue
Tell students about art the movement The Style and two of its most famous contributors Piet Mondriaan and Theo van Doesburg. 

Draw 4 lines with 10 cm between them from bottom to the top of the black sheet. The last strip (1 cm) is the glue strip. 
Draw four squares or rectangles on the black sheet. Then draw lines from about 1 cm wide. Cut the spaces between the lines and paste wax paper behind them. 
Finish the lantern by folding the four lines and pasting it. 

Monday, November 14, 2016

Moon behind tree

Made by a student of grade 6
You need:
  1. white drawing sheet 
  2. charcoal
  3. chalk pastels 
  4. indian ink
  5. brush 
Use a saucer to draw a moon in the center of the sheet. Colour it with yellow chalk pastel. Colour the rest of the sheet grey using charcoal: around the moon it's brighter than further away.
Draw a branch and paint it with Indian ink.