Posts tonen met het label animals. Alle posts tonen

zaterdag 22 oktober 2011

Blob creatures


You need:
  1. white drawing sheet A4 size
  2. tempera paint
  3. scissors
  4. glue
  5. black marker
  6. black paper for background
Start by folding the white sheet of paper in half and open it up again. Then drop blobs of tempera paint in three different colours somewhere around the middle of your paper. Don't put the paint to close to the edges. Fold the sheet and press by firmly moving hands around. This movement will move the paint around more than just folding.


Open the paper and dry flat.
Look carefully at this creature. Outline the creature with a black marker. Look for typical shapes, like arms, eyes, ears etc. and trace them with a marker. The drawing should be totally symmetrical.

Cut the creature, leaving half cm white around the black lines. Paste it on a coloured background.
Made by students of grade 4

woensdag 12 oktober 2011

Three owls of clay

Artworks are made by students of grade 5
You need:
  1. clay
  2. two beer coasters stapled together
  3. clay plate
  4. clay knife
In this lesson students will sculpt three massive forms together and then decorate them.
View pictures of owls and talk about the basic shapes: an oval for the body, round eye shapes, conical beak and plumes (note, these are not ears, because they are on the side of the head).


Students make three egg shapes in different sizes. The pointed end is the bottom of the owl. Modell these shapes together. Work out the shapes by attaching wings, beaks, plumes, eyes etc. The wings are made from flattened clay balls. To attach the wings, roughen the bonding side and press the wing firmly on the body.
Do the same with beak and plume using a conical shape. Make eyes by pressing the finger in the head. Apply texture to the wings, the body and around the eyes using a clay knife or little sticks.
Place the work on two stapled beer coasters. Let it dry for a few weeks before baking.

vrijdag 16 september 2011

Same animal, different colours

Made by a student of grade 1
You need:
  1. two white drawing sheets A4 size
  2. oil pastels
  3. liquid water colour
  4. brush
  5. jar with water
A lesson about cool and warm colours.
Draw an animal on a white drawing sheet. Be sure it's not too small. Ask the teacher to make a copy of this drawing. Colour the first animal with oil pastels in warm colours, the second one in cool colours. Paint the background with liquid water colour, using warm and cool colours as well.
Paste both drawings below or next to each other on a large white sheet. 


donderdag 28 april 2011

Printed birds

You need:
  1. white drawing sheet A4 size
  2. two potatoes, middle and small size
  3. knife
  4. sauzer
  5. tempera paint
  6. piece of corrugated box cardboard  
  7. paper towel
  8. fine black marker
  9. brush
  10. watercolour paint
In 'The Usborne Complete Book of Art Ideas' I found this great lesson.
Place a paper towel on a saucer and spray a stripe of brown paint on it. Use the side of a piece of corrugated cardboard of about 7 cm to stamp branches.
Cut the medium potato in half and cut this half again. Stamp the bodies of the birds using red tempera.
Cut the half potato in two pieces. Use the quarter to stamp the tails.
Cut the small potato in half and stamp the faces of the birds.
Clean this half potato with a tissue and cut it in two. Stamp the wings.
Paint beaks, eyes and legs. Leave the work to dry. Paint the background with watercolour paint. Outline the birds with a fine black marker.
To make spring art work, you can add leaves by stamping them, cutting them out of green paper, using real dried leaves or .....use Paint shop pro, like I did!

maandag 25 april 2011

Fantastic felines like Laurel Burch


You need:
  1. pink or purple constrution paper A3 size
  2. oilpastels
  3. tempera paint
  4. brushes
  5. gold and silver markers
  6. glitter
  7. glue

Laurel Burch (1945 –  2007) was an American artist, designer and businesswoman. As a 20-year-old single mother she found metal in junkyards to hammer into jewelry to support her two children, and went on to launch her business, now called Laurel Burch Artworks, in the late 1960s with the help of a small staff that worked out of her house. She began making paintings and was commissioned by restaurants, businesses and private collectors. Burch designed, among other things, beads, jewelry, paintings, T-shirts, scarves, coffee mugs and tote bags, but 90% of her designs derived from her original paintings.

Especially Burch's cats are recognizable. Few some of her paintings on the website of Laurel Burch and discuss the salient features: bright colours, bold pattersn, eyes and nose are drawn out of one line. use of silver and gold.
 
Students draw a cat on purple or pink paper in the style of Laurel Burch. Colour the cat using different materials like tempera, oilpastels, gold and silver markers. Outline the cat with silver or gold. Draw a frame around the artwork. Use glitter to accentuate lines.

All artworks are made by students of grade 5


zondag 17 april 2011

Charming chicken

Made by a student of grade 5

You need:
  1. blue and yellow construction paper A4 size
  2. oil pastels
  3. glue
Draw a chicken on blue construction paper, using the tutorial on How to draw a chicken. Make it a charming chicken by colouring it in bright colours. Mix colours to create smooth transitions. Draw a horizon line and colour the ground. Draw somethin on the horizon line, Teken een horizonlijn en kleur de grond. Teken iets op de horizonlijn, for example a fence or a farm. 
Tear the edges of the blue sheet away and paste the chicken on a yellow undersheet. Draw eggs around it.

Made by students of grade 6

maandag 4 april 2011

Chicken on a stick

You need:
  1. cardboard box
  2. tempera paint
  3. brush
  4. coloured paper
  5. wooden skewer
  6. scissors
  7. glue
Draw a chicken on cardboard. Cut it. Paint the chicken and colour the beak. Cut two wings out of cardboard and cover them with coloured paper. Paste the wings with double sided tape on the chicken to make them look 3D. Cut a comb and wattle out of coloured paper and paste them on the chicken. Use a marker to draw an eye.
Cut three pieces cardboard of 8 by 5 cm and stick them together. Paste coloured paper around it. Insert a skewer into the stand and plug the other end in the chicken.

zaterdag 2 april 2011

Fairy tale comic


Hansel and Gretel

You need:
  1. white drawing sheet A5 size
  2. pencil
  3. markers or colour pencils
  4. fine black marker
The goal for this lesson is to convert a famous fairy tale into a comic. Students may draw only four pictures, so they should think very carefully about the most important scenes in the story. The story should be obvious from just those four pictures!

Divide the sheet into four sections. Draw four scenes and use speech bubbles if you want to. Colour the drawings with markers or colour pencils. Outline them with a fine black marker. You can choose to colour the drawings completely, but also a black and white strip with a single accent colour is nice.

All artworks are made by students of grade 6

woensdag 30 maart 2011

Puss in boots?


You need:
  1. drawing sheet A4 size
  2. pencil
  3. ruler
  4. indian ink
  5. brush
  6. saucer
  7. dip pen
Master Cat or The Booted Cat commonly known as Puss in Boots, is a French literary fairy tale about a cat who uses trickery and deceit to gain power, wealth, and the hand of a princess in marriage for his penniless and low-born master. The tale was published in 1697 by Charles Perrault as part of his collection Mother Goose's Tales.

How would it be if the animal you like most, wears boots? What kind of boots would he wear - rain boots, cowboy boots, thigh boots, high-heeled boots?

Draw a frame at 1 cm from the edges with a pencil. Sketch the contours of an animal in boots with pencil. Make sure the boots stand out well. Trace the pencil lines with a dip pen and indian ink. Draw details and a simple background.
The colouring has to be done with indian ink too. Put a few drops of ink on a plate and dilute it with water. More water will give a ligth grey, a little water will give dark grey. Finally, fill the page edge with a pattern or a shade of gray.
Both artworks are made by students of grade 6

zaterdag 5 maart 2011

Rainbow fish

Made by students of grade 3

You need:

  1. drawing sheet A5 size
  2. ruler
  3. pencil
  4. colour markers

The students put the sheet in the width and draw from top to bottom pencil lines 1 cm apart. Good to practice measure skills!

Draw a fish and a sea bottom line. Colour the fish with markers keeping the same sequence of colors. We chose the order of the colours as they were in the box. Fins, background and bottom should be coloured in the same order, but of course the colours here are staggered to those of the fish.

zondag 16 januari 2011

Searching for the chameleon

You need:

  1. white drawing sheet A4 size
  2. oil pastels
  3. scissors
  4. small pieces of foam
  5. double sided tape
Start the lesson with this poem about a chameleon.
Has anyone seen my chameleon this morning?
He has to be hiding somewhere.
He asked me if we could play hide-and-go-seek,
and then disappeared into thin air.
I've looked high and low in the yard and the house
and it seems like he's nowhere around.
He's probably hiding right out in the open
but doesn't yet want to be found.
I'm guessing he looks like a leaf on a bush
or the back of a sofa or chair.
He could be disguised as a book or a bagel.
Regardless, I don't think it's fair.
If you come across my chameleon, please tell him
I give up. He beat me today.
He's clearly the champion at hiding so, next time,
it's my turn to pick what we play.
Kenn Nesbitt
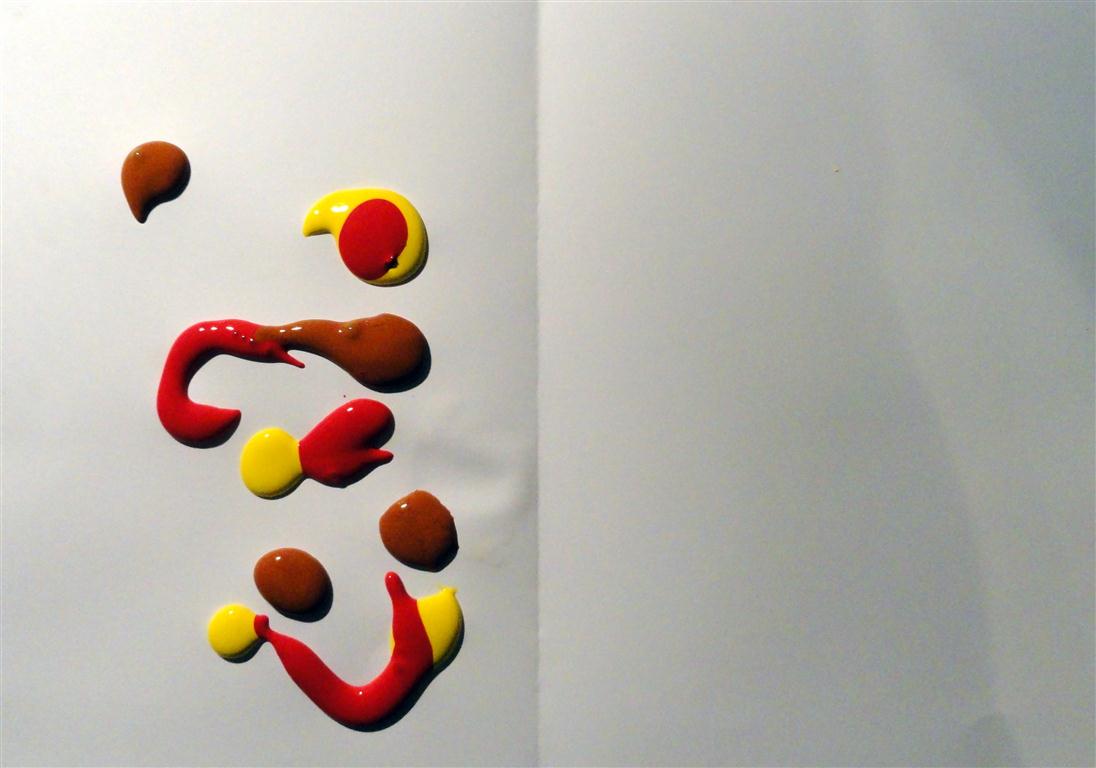
Draw shapes of your choice on the sheet. Leave about 1 cm white between the shapes. Colour them with three or four different colours of oil pastels.

Draw a chameleon on another sheet and colour it the same way as the first sheet: coloured shapes with one cm white between them. Cut it out with a one cm white around it. Use small pieces of foam and double side tape to paste the chameleon on the background. The chameleon will be slightly higher.

All artworks are made by students of grade 6

dinsdag 11 januari 2011

Colourful cows, like Peter Diem

You need:

  1. white painting sheet A3 size or a canvas
  2. acrylic paint
  3. brushes
  4. jar with water
  5. paper towels

Peter Diem (1945) is a Dutch painter. Diem, born from a Dutch father and a German mother, came in Amsterdam at the age of 3. He had a difficult childhood in which the people of Amsterdam showed they were not charmed by Germans so soon after the Second World War. After highschool Diem went to a school for graphic design to study graphic work. Through several European countries Diem landed in the 70's in the USA, where he married and had children. Halfway through the 90's he returned to the Netherlands and settled with his Diem Museum on the Prinsengracht Amsterdam.

Diem is inspired by the CoBrA Group ( a group of artists from Copenhagen, Brussels and Amsterdam - see also my lesson about CoBrA artist Corneille). His style is abstract and expressive. He brings the paint thick on the canvas, sometimes directly from the tube. With brush, knife and fingers the bright coloured paint is spread across the canvas. 'Diem paints like a tornado, he lives his art'. Themes in his work are flying cows, Napoleon, Africa and Ernest Hemingway.

Show artwork of Diem on the digital board. Pictures are to be found on Diem's website or use the Google picture viewer and look for Peter Diem. Discuss Diem's work:

  • subject, Diem paints often cows
  • use of bright colours
  • simplicity of the image
  • thick black contour lines
  • no white spots anymore
  • the cow is full screen
Show students how to draw a simplified cow, by drawing a cow on the digital board (click on the picture to enlarge). Let the children draw a picture of a simple cow. They have to sketch thin, without drawing many details. The cow has to be painted with acrylic paint, considering the features of Diem's work. Paint a background. Outline the cow with black paint and a small brush. This will also eliminate the unevenness. And of course the work has to be signed, just like Diem does!

All artworks are made by students grade 5

dinsdag 4 januari 2011

Stuffed animal

You need:

  1. white or coloured drawing sheet A4 size
  2. chalk pastel
  3. pencil
  4. hairspray
  5. stuffed animal

Ask students to take their favourite stuffed animal for this lesson. Let them choose their own drawing sheet. In my class students had to choose from grey, brown or white.

Tell students how to work with chalk pastel: you have to colour lightly and then smudge the chalk with your fingers. Don't produce to much powder, because you won't be able to smudge it away anymore. Vary with colours; you may use two colours and smudge them together. Tell students about light and show them lighter and darker parts of the stuffed animals. Use white chalk to lighten up parts of the stuffed animal, and black chalk to darken colours and make shadows.

Draw a horizon line and sketch your stuffed animal lightly with a pencil. Colour it with chalk pastel. Chalk pastel will emphasize the softness of the animal. Create a background and colour it completely. Use hairspray to fixate the chalk and paste the work on a coloured background.

All artworks are made by students of grade 6.

zaterdag 25 december 2010

Owls in the night

You need:

  1. blue construction paper 15 by 20 cm
  2. white tempera paint
  3. piece of cardboard
  4. brush
  5. saucer
  6. paper towel
  7. fine black marker
  8. yellow pencil

Draw a moon and colour it with yellow pencil. Paint the bottom of the blue sheet white with tempera paint.

Put a paper towel on a saucer. Put a stripe of white tempera paint on the towel. The paper towel will function as a stamp pad. Dip the edge of a piece of cardboard into the white paint and print a trunk. Drag the cardboard a bit to create a thicker trunk. Print several branches. Be sure to leave some space between the branches for the owls.

Use a fingertop and white paint to print the body of the owls. Leave the work to dry.

Draw eyes with a yellow pencil. Outline the eyes with a fine black marker. Draw details like feathers, beak and legs.

Print snow flakes using a q-tip or the end of a brush.

zaterdag 18 december 2010

Penguins and polar bears

Made by Jorine, grade 6

You need:

  1. white drawing sheet A4 size
  2. plastic wrap
  3. watercolour paint
  4. brush
  5. jar with water
  6. black waterproof marker
  7. white tempera paint
  8. orange marker
  9. glue
  10. coloured cardboard
  11. white pencil

Paint a part of the sheet with blue water paint. Use lots of water. While the paint is still wet, push plastic wrap on it to create floes and then leave the sheet to dry. Remove the wrap.

Use a waterproof black marker to draw several penguins. Colour the black parts and draw wings. Use white tempera to paint the bellies. Leave the work to dry and draw eyes and beaks.

Draw a polar bear on the ice. Trace the pencil lines with a fine black waterproof marker. Paint the bear with white tempera paint, including the black lines to make them a bit hazy. Paint the background with a mixture of white tempera and a little blue. In the example the mix is made of white tempera and the blue rinse water of the water paint.

Paste the work on a coloured background and draw ice crystals along the edges with a white pencil.

vrijdag 5 november 2010

Totem poles

Made by three students of grade 6

You need:

  1. drawing paper A4 size
  2. coloured markers
  3. coloured cardboard
  4. pencil
  5. potlood
  6. scissors
  7. glue
A totem pole is a wooden statue that was made by native tribes and was seen as a sanctuary. The pole was usually made of wood from the cedar tree and was often painted in bright colors. Show different pictures of totem poles. View and discuss the images that are cut in the totem poles.

In this lesson groups of students draw a totem pole together. To make one drawing together, some appointments should be made: the width, the colours, which drawing on which place etc.

Create groups of three or four students. Each student draws a portion of the totem pole and colours it in with coloured markers. Outline each colour with a thick black marker. Each student cuts his totem pole piece. The parts should be pasted into a whole picture on coloured cardboard. Finally, outline the exterior of the totem pole with a thick black marker.

woensdag 3 november 2010

Cool web, big spider

You need:

  1. white drawing paper 20 by 20 cm
  2. left overs of white drawing paper
  3. yellow crayons
  4. liquid watercolour
  5. thick brush
  6. jar with water
  7. scissors
  8. glue
  9. black construction paper

Students draw a web with a yellow crayon. The easiest way is to first draw diagonal lines from the corners of the paper. Then draw more lines from top to bottom, left to right. The lines must all go through the center. After this draw circles around the center, until the sheet is full.

Paint the sheet using liquid watercolour ink in cold colours. Take two colours. Leave the work to dry.

Draw some leaves with a warm colour crayon on a white sheet. Draw the veins. Paint the leaves with warm colours liquid watercolour. Let the leaves dry.

Make a spider of black construction paper. In the example above, the spider is made of a circle with a diameter of about 4 cm. Cut the circle in to the center and stick the cutting edges on each other so the center rises. Draw a cross on the back if you want to. Cut a smaller circle for the head, draw eyes on it and paste it on the body of the spider. Cut the feet: 8 strips of 8 cm by 1/2 cm. Glue the legs on the underside of the body. Make a fold inwards on the mid of the strip, and 1 cm from the end a fold outwards.

When the work is completely dry, cut the leaves and paste them on the web. Put the spider in the web by pasting the lower parts of the legs and the head.

Paste the artwork on a black background. You may draw the spider web lines on the background too.

woensdag 15 september 2010

Birds like Corneille (2nd lesson)


This lesson about Corneille is almost the same as the lesson I posted a few days earlier. However, drawings in this lesson are made with oilpastels by students in a lower grade. 

 You need:
  1. white drawing paper A4 size
  2. oil pastels
  3. coloured ink
  4. brushes
  5. jar with water
  6. coloured paper for background
  7. glue or stapler
Life and work of Corneille
See my former lesson for information about the artist. 


What to do?

Show examples of Corneille's work. What subjects do you see in his paintings? What can you tell about his style: bright colours, thick black outlines, few details, painted as if it was made by a child, an image that sometimes is not complete (missing parts at the edges).
 
Draw the outline of a bird with a black crayon. Make surethe bird reaches at three edges of the sheet: it should be big! Colour in bright colours and/or patterns. Paint the background with deluted blue ink. Stick the drawing on a coloured sheet.
 
All artworks made by students of grade 3

zaterdag 11 september 2010

Animals like Corneille

You need:
  1. white drawing paper A3 size
  2. tempera paint
  3. brushes
  4. paper towels
  5. jar with water
  6. coloured paper for background
  7. glue or stapler
Life and work of Corneille
Guillaume Cornelis Beverloo (1922 - 2010), Corneille, was a Dutch artist, born in Belgium and died in France. He is buried on the same cemetery as Vincent van Gogh, a painter he highly admired . 

Corneille was an autodidact. In his early years he painted realistic: still lifes, people and landscapes. In 1948 Corneille was involved in the creation of the CoBrA Group, a group of Danish (Copenhagen), Belgian (Brussels) and Dutch (Amsterdam) artists. Even writers and poets belong to the CoBrA group. The artists' group only existed for three years, but has been very important for Corneille's work. 
According to Corneille, the CoBRA artists want to express themselves on a expressionistic way, like children, by playing open-minded with colours and shapes. Since 1950 Corneille lived and worked in Paris. His paintings are bright and colourful. The sun, women, paradise, trees and birds are recurring elements. He is particularly fond of birds. His artist name Corneille is French for 'crow'.

What to do?
Show examples of Corneille's work. What subjects do you often see in his paintings? What do you notice about his style? Discuss the features: bright colours, thick black outlines, few details, painted as if it was made by a child, an image that sometimes is not complete (missing parts at the edges).
 

In this lesson students have to sketch very briefly (maximum 5 minutes!), to avoid drawing too many details and to force them to work big. Students may  also choose to sketch with a small brush and light yellow paint. This will automatically result in working big with little details. The yellow lines can easily be painted with different colours later.
 
Sketching with yellow paint

Sketch the outline of a cat or bird and make sure this animal reaches at least three edges of the sheet: it should be big! Paint the animal in bright colours and/or patterns. Paint the background too. Leave the work to dry and outline everything using a small brush and black paint. Paint your name in black somewhere at the artwork, like Corneille did. Stick the painting on a coloured sheet.
 
All artworks made by students of 11 years old

maandag 5 juli 2010

Tropical fish

You need: 1.white drawing sheet A3 size 2.tempera paint 3.brushes 4.saucers 5.jars with water 6.drawing sheet A4 size 7.markers 8.paper towels 9.pieces of sponge 10.magazines 11.scissors 12.glue After a visit to a marine aquarium, children of our school made their own ocean with tropical fish. Dilute tempera paint with water on a saucer. Paint the A3 sheet blue and leave it to dry. Stamp paper plants and corals on the sheet using a piece of sponge or a wad of paper. Use undiluted tempera for the stamping.

Draw a fish on a folded piece of drawing paper. Cut the fish, so you'll have two of them. Colour these two fish with bright colors, just like the tropical fish in the aquarium. Draw and cut a few more fish. Colour them like the first two; all fish must be the same color, they should only vary in size. Create a beautiful composition of the fish on the blue-painted sheet. Stamp some strings of aquatic plants before the fish. Or cut green strips from magazines and paste on the artwork.

All artworks are made by children of 10-12 years old