woensdag 25 september 2024

Haunted house in the moonlight


You need:
  1. white drawing sheet A4 size 
  2. black construction paper
  3. yellow chalk pastel
  4. scissors
  5. cutting knife
  6. glue
  7. white pencil
  8. black marker
  9. blue and purple tempera paint
  10. sponge
  11. saucer
This lesson is all about Halloween and haunted houses. 

What to do? 
  • Tear a strip of black paper from about 5 cm and paste it on the bottom of the white sheet: the ground. 
  • Draw a old house on black paper and cut out.
  • Use a cutting knife for doors and windows. 
  • Paste the house on the white sheet. 
  • Use a white pencil for details such as bricks, ghosts, spiders, spider webs etc. Use a black marker to draw things in the open window.
  • Cut and paste a moon. 
  • Outline moon and house with yellow chalk pastel and smudge the chalk outwards. 
  • Stamp the background with purple and blue tempera and a sponge. 
  • Finally paste the artwork on a yellow background sheet.

zondag 15 september 2024

Sunflowers in pieces

by Neil 

Celebrate end of summer by tearing your sunflower artwork in pieces!

This lesson shows we can do more with our artworks dan stick them on a colored background. Pretty scary to tear or cut your drawing, but the effect is great! 

You need: 

  1. white drawing sheet 
  2. black construction paper for background 
  3. pencil
  4. oilpastels
  5. liquid water color paint
  6. brush
  7. scissors
  8. glue

Draw at least four sunflowers. Be sure three of them are over  the edges.  Color them with oilpastels. Paint the backgrond with liquid water color paint. 

Neil's drawing is torn in pieces. Those pieces have been re-glued for a spatial effect. Before tearing check which side of the paper is best. One side gives nice white tear lines, the other side does not.  

by Lyan

Lyan and Jurre have pasted black strips over their artwork, creating a window through which you look outside. 

by Jurre

Elements of art: color, space.

zondag 21 juli 2024

Olympic athletes

You need:
  1. scissors
  2. glue
  3. white drawing paper A1 size
  4. cardboard in Olympic colors
  5. compasses
Start this lesson with the symbol of the Olympics: the colored rings. What do these rings mean? What colors do they have? How are they placed together? Ask one or two children to take the position of an athlete. What is the position of the legs, arms and body? Ask another student to show another position and discuss it again.
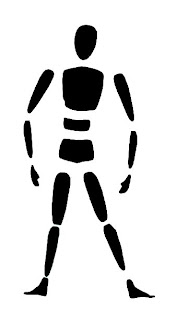
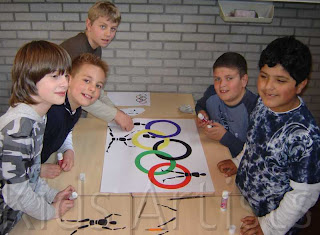
This is a group work for five students. Every group gets a big white sheet, five sheets of colored cardboard (colors of the rings: black, yellow, red, blue, green) and at least five copies of the athlete.
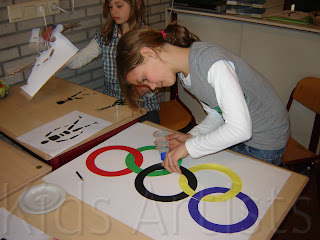
Step one: each group member cuts an Olympic ring, using compasses and scissors. Paste this five rings on the big white sheet. Look carefully which ring has to be pasted in front or back, and which ones have to be pasted through each other. Be sure the little cutting line is pasted underneath another ring.

  Step two: Every student takes a copy of the body and cuts every part of it. Then these bodyparts have to be pasted around, in, behind and in front of the Olympic rings.