You need:
- drawing sheet A3 size
- tempera paint
- brushes
- white construction paper
- scissors
- oilpastels
- glue
Claude Monet (1840-1926) is considered one of the most important painters of Impressionism.

Typical for Impressionists:
- they choose subjects from ordinary life
- special attention for light and color
- work in the open air
- smooth brushstrokes
- dashes resemble a sketch
- it's about the impression!
Discuss the term impressionism. Show some paintings by Monet and zoom in on a work with water lilies in Arts & Culture. Do students see the characteristics of impressionism in this artwork?
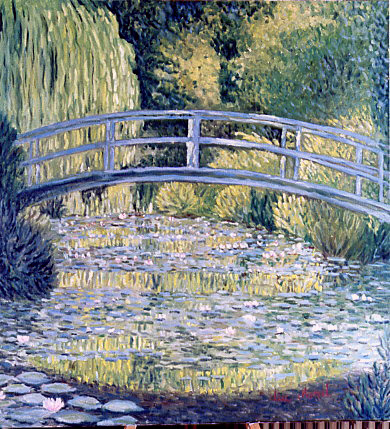
Monet had a large garden with a pond and a Japanese bridge in Giverny France. He liked to paint in that garden. His works of water lilies are therefore famous and are the basis of this lesson.
Lesson 1
Draw a horizon line above the middle of your sheet. Paint the pond and the sky with short brush strokes, like Monet did. Do not mix the paint, but take two colors on your brush. Make sure the blue color of the pond is not the same color as the sky.
Paint trees on both sides of the sheet in the same way. Paint water lilies in the pond. Be sure that they are larger in the front of the pond than in the back.
Lesson 2
Have someone take a picture of you that shows you all the way. Print the photo and cut it out.
Cut three parallel arcs from about 1,5 cm wide from the construction paper. Then cut four straight pieces of 1,5 cm wide. Paste the photo on the work and paste the bridge over it.

All artworks are made by students of grade 6
Source: MaryMaking.blogspot.com