Posts tonen met het label printing. Alle posts tonen

vrijdag 15 augustus 2025

The vase of Kandansky


You need
:

  1. colored cardboard A3 size
  2. sponges
  3. paint rollers 
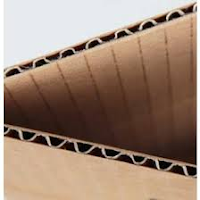
  4. strips of  ribbed cardboard
  5. bubble wrap
  6. tempera paint
  7. brushes
  8. scissors  
  9. glue
Read here about Kandinsky's concentred circles. 


Organisation
Divide this lesson in two moments. For lesson 1 (step 1-4) create four table groups where students can print. Divide the students among these four groups. When someone is ready, he can go to the next group. In this way students rotate between the groups. In lesson 2 (step 5) the individual parts are combined into a work of art and students sit in their own place in the classroom.  

Group A: printing with sponges. One sponge per color. Some paper plates with tempera paint and a paint roller on each plate. 

Group B: printing with cardboard. Lay out cardboard strips  about the width of a ruler. Spray s few colors of tempera paint on paper plates. Students smear the head side of the cardboard with a brush, see picture. 

Group C: printing with bubble wrap. Lay out A4 sie drawing sheets and pieces of bubble wrat. Students roll in the bubble wrap with a paint roller and print it on a sheet. 

Group D: painting concentric circles. Place thick drawing paper, tempera paint and paper plates here. 


What should you do? 
Step 1: Place the colored cardboard upright in front of you. Stamp approximately 1/3 of the bottom fyll with a sponge and paint. Don't rub, stamp!  

Step 2: Stamp with the cardboard strips horziontal and vertical stripes above the sponge strips. 


Step 3: Use a paintroller to roll a piece of bubble plastic with tempera paint and print it on a white sheet. Let dry. 


Step 4: Fold a white A4 sheet into 6 squares. Paint 6 different concentric circles in each square like Kandinsky did. Each circle had 3 colors. Let dry.  


Step 5: Cut the circles. Draw a symmetric vase on the back side of the bubble plastic print and cut out. Paste vase and flowers on the colored cardboard. 

all works of art are made by students of grade 3 

Elements of art: color, nuance, shape, line
Techniques: printing with different materials, painting, cutting, pasting.  

woensdag 17 juli 2024

Stamping with Mondrian


Goal:
 reducing the visible world in horizontal and vertical lines and primatr colors.   
Technique: stamping. 

You need:
  1. black cardboard 
  2. sponges cut in different sizes (squares and rectangles) 
  3. tempera paint in red, blue and yellow 
  4. brushes
  5. white crayons 
View these artworks of Mondrian and talk about how he abstracted a tree. 

Also talk about Victory Boogie Woogie, the painting in which you can see part of the map of New York. Tell students we are going to make our own Mondrian map. Discuss the terms primary colors, square, rectangle, vertical and horizontal lines.


Instruction 
Brushes will not be rinsed, but will remain the same color.
Show how to use a brush to rub the sponge with paint. 
Show how to stamp: do not slide the sponge, but lift it off the paper. This way you'll get a tight shape.  
Stamp horizontally or vertically only. 
Do not stamp two of the same colors next to each other. 
Make sure the shapes don't touch each other. You must be able to see the black roads between them. 


When the work had dried, draw stripes on the black roads using a white crayon. 

Elements of art: shape, color, line. 


Artworks are made by students of grade 1/2. 

zaterdag 15 juni 2024

Monet's waterlilies pond

 You need:

  1. drawing paper A3 size
  2. tempera paint in green, blue, white, red and yellow
  3. two brushes per student
  4. two spunges per student
  5. paper towels
  6. oil pastel crayons 
  7. schotels  
Claude Monet (1840-1926) is considered one of the most important painters of Impressionism. 

 Typical for Impressionists:

  • they choose subjects from ordinary life 
  • special attention for light and color
  • work in the open air
  • smooth brushstrokes
  • dashes resemble a sketch
  • it's about the impression!
Discuss the term impressionism. Show some paintings by Monet and zoom in on a work with water lilies in Arts & Culture. Do students see the characteristics of impressionism in this artwork?

Monet had a large garden with a pond and a Japanese bridge in Giverny France. He liked to paint in that garden. His works of water lilies are therefore famous and are the basis of this lesson.

Lesson 1
Squeeze some blue, green and white paint onto a saucer. Dipt your sponge into the blue paint. Stamp on the sheet. Do the same with green paint and stamp all over the sheet. Finally do this with white paint. You can use the green side of your sponge,  to get a light green color also. Let the work dry.


Lesson 2
To paint the water lilies: mix a little bit of red with white paint. Paint ovals spread across the sheet. Not too neat, it's all about impression!
Paint a green border at the bottom of the ovals: the leaf. To make it fresher, you can mix some light green paint and use it. You don't have to clean the green brush first. 
Then paint a heart in your flower with yellow. Let the work dry. 
Finally draw lines in your lily with a dark red or purple oil pastel: the petals. 

Artworks made by students of grade 1 and 2.

dinsdag 12 maart 2024

Pretty tulip prints


You need:
  1. corrugated cardboard or a cardboard box 
  2. scissors
  3. roller 
  4. blockprint or tempera paint* 
  5. colored or white sheets 
* blockprint dries more slowly and therefore works better than tempera paint. 


With cardboard boxes you can make beautiful prints. These tulips are cut from a cardboard box. 

roll in with block print

Cut a simple tulip from cardboard. Roll them in different colors and print several times on a sheet. Experiment with colors on top of each other and wet in wet. Print the tulips in several heights and let them overlap for a spatial effect. Let dry and stick the art work on a colored sheet. 


Elements of art: space, color, texture. 

zaterdag 15 april 2023

Cherry blossom tree

You need:

  1. drawing sheet
  2. tempera paint in red and white 
  3. crayons
  4. liquid water color paint
  5. brush
  6. broccoli 

Step 1
Draw a tree with crayon.  


Step 2
Paint the background with diluted liquid water color paint and let dry.  


Stap 3
Stamp blossom with pieces of broccoli.  
 

Source: www.gluedtomycraftsblog.com 

zondag 5 februari 2023

Art Noveau tiles


You need: 

  1. colored paper 10 by 10 cm
  2. linoleum 10 by 10 cm
  3. colored cardboard karton 25 bij 25 cm
  4. carbon paper
  5. lino knife
  6. flat piece of glass
  7. block printing ink
  8. lino roller
  9. lino press
  10. glue
Art Nouveau or Jugendstil is an art style that was practiced from 1890 and abruptly stopped with the start of World War 1 in 1914.  t die werd beoefend vanaf circa 1890 en abrupt stopte met de start van WO1 in 1914. 

Art Noveau was mainly applied to everyday products (for emample furniture, glassware, jewellery), in architecture, graphic art and painting. Artists were inspired by nature: patterns with birds, flowers, plants. clouds, rocks, women.  Graceful moving lines express emotion. 

Show Art Noveau tiles: with 2 mirror lines or tiles that form a tableau in a group of 4. 


Explain we are going to print tiles of 20 by 20 cm with linoleum and ink. Ask how you can print an entire tile with an piece of linoleum from only 10 cm: by turning the same stamp 90 degrees each time you make a print.  
Explain how a two-color print works: information here.

What should you do?
Step 1: Draw a quart of a tile on a sheet. 
Step 2: Copy the drawing with the carbon paper on the linoleum. 
Step 3: Cut the background away: the image remains.   
Step 4: Make 8 prints on sheets of 10 by 10 cm and let dry.
Step 5: Wash the linoleum and let dry. 
Step 6: Cut extra details out of the image.
Step 7: Print on the previous prints with a different color.   
Step 8: Choose the best prints. Stick them on the cardboard while making a quarter turn each time. 

All artwork is made by students of grade 6. 

maandag 10 mei 2021

Vincent van Gogh's chair


You need:
  1. for prints: colored paper 14 by 14 cm 
  2. for background: colored paper 
  3. linoleum 12 by 12 cm
  4. carbon paper
  5. lino knife
  6. flat piece of glass 
  7. block printing ink
  8. lino roller
  9. lino press
  10. glue

The painting The chair is from 1888 (The National Gallery, London). View this painting and discuss it using elements of art. What do you see? What stands out? What do you on the chair? What can you say about the perspective? What materials did Van Gogh use? What do you think about the colors? Do you like the painting or not, and why is that?  

Print the drawing below as a picture of 12 by 12 cm. 


Transfer the lines from the image to the linoleum using carbon paper and a pen. 


Cut out the lines.


Make two prints in colors you like. You can mix them too! Let dry. 


Stick the works on a matching colored sheet. 

Elements of art: color, space, line. 

zondag 25 april 2021

Van Gogh's bedroom

        by a student of grade 6 

You need:
  1. for prints: black and white sheets 18 by 14 cm 
  2. for background: black and white construction paper 31 by 19 cm
  3. linoleum 16 by 12 cm
  4. carbon paper
  5. lino knife
  6. flat piece of glass 
  7. block printing ink
  8. lino roller
  9. lino press
  10. glue

The painting The bedroom is from 1888. View this painting and discuss it  using elements of art. What do you see? What stands out? What do you see on the wall? What can you say about the perspective? What materials did Van Gogh use? What do you think about the colors? Do you like the painting or not, and why is that?  

Print the image below on 12 by 16 cm for each student. 

Transfer the white lines from the image to the linoleum using carbon paper and a pen. Cut out the white lines and parts. 


Cut out your name in mirror writing at the bottom left. 
Make four prints: two with white paint on black paper and two with black paint on white paper. Let dry. 
Stick the white sheets on black paper and the black sheets on white paper. Use 1 cm of the sheets to stick them together.

all artworks of grade 6

Elements of art: color, space, line. 

zondag 18 oktober 2020

In 'The Factory' of Andy Warhol

made by students of grade 1

You need: 

  1. colored paper 12 by 12 cm
  2. black construction paper 50 cm by 15 cm 
  3. tempera paint
  4. brushes
  5. apples
  6. glue
  7. black marker 

Tell about Andy Warhol's Factory. 

First lesson: "We are going to work today in the factory of Andy Warhol. Choose four colored sheets. Make apple prints in complementary colors: on a blue sheet you print an orange apple, on a red sheet you print a green apple etc."

Let dry and paste the colored sheets on black construction paper.

Second lesson: make a second print in a complementary color: on the orange apple you print a blue one etc. Let dry. Outline the apples with a black marker and add seeds and stem. 


zondag 23 augustus 2020

The birds of George Braque


You need:
  1. white drawing sheet A3 size
  2. white drawing sheet A6 size 
  3. linoleum
  4. lino knife
  5. lino press
  6. lino roller
  7. tempera paint
  8. brushes
  9. scissors and glue
George Braque (1882-1962) was a French painter and sculptor. Together with Picasso he was founder of cubism.
After is cubist time, Braque painted simplified figurative paintings of landscapes and still lifes with musical instruments and bottles. Remarkable are the letters and nummers Braque added to his works.
When Braque became ill, he was no longer able to paint. He turned to making color litographs of simple bird silhouettes. The same birds you that can also be seen in one of the ceiling paintings of the Louvre in Paris.

View the lithographs of birds and discuss the artwork:

  • simple shapes (silhouettes) 
  • background is often blue
  • few colors in the artwork
  • birds are black or white
  • birds are painted or printed 

Process: 
Draw a silhouette of a bird on A6 sheet and copy it to the linoleum. Cut away the background, so the bird stands out. Paint or stamp a background on the A3 sheet. Make some prints of the bird in black and/or white and let dry. Be sure to get birds in several color nuances by not rolling the lino every time.
Cut the printed birds and paste them on the background.

door Quinty, groep 7

Elements of art: form, space, nuance, color
Techniques: printing, painting, cut&glue

dinsdag 4 december 2018

We wish you a merry Xmas

You need:
  1. green construction paper, 20 by 20 cm
  2. white tempera paint
  3. white pencil
  4. fine markers in white and black
  5. colored markers
Draw staves on the sheet using a white pencil. Make fingerprints for the snowmen: use the tip of your finger for the head, use your thumb for the body. Wait till the paint has dried. Use a black fine marker to draw brooms, branches=arms, stones=eyes+mouth. Draw the carrot = nose with orange marker and draw caps of hats on some of the snowmen.
Finally, draw the text of We wish you a merry Xmas (or another Christmas song) under the staves. 


Source: 50 Xmas things to make and do, Usborne

donderdag 30 november 2017

Gingerbread man printing lesson

 
You need:
  1. two pieces of linoleum 10 x 10 cm
  2. lino knife
  3. block printing ink
  4. flat piece of plexiglass
  5. linoleum roller
  6. white sheets
  7. lino press
  8. scissors, glue
  9. coloured paper
Draw a gingerbread cookie on both pieces of linoleum. Cut away the outlines of the first linoleum, and the background of the second one. Print in one or two (Christmas) colours and paste on coloured paper.

zondag 30 oktober 2016

Mondriaan collage with printed lines


You need:

  1. paper in primary colours
  2. white sheet A3 size 
  3. pieces of cardboard 
  4. black tempera paint
  5. saucer
  6. ruler 
  7. pencil 
  8. scissors 
Just like Piet Mondriaan (De Stijl), students draw rectangles and squares using ruler and pencil on construction paper in yellow, blue and red.  After this the drawings have to be cut and pasted on a white sheet. However Mondriaan did not: students may stick colours together.  
Stamp straight lines using a piece of ribbed cardboard and black tempera paint. 

Made by a student of grade 3 

Source: http://artroom104.blogspot.nl/ 

zondag 31 augustus 2014

Buzzzzzing bees


Made by a student of grade 2.

You need:
  1. bubblewrap
  2. paint roller
  3. drawing sheet 
  4. yellow and brown tempera 
  5. yellow pencil
  6. fine black marker 
Roll a piece of bubble wrap in with yellow paint and print it. Let dry.
Make fingerprints in brown paint and let dry.
Draw lines with yellow pencil on the body of the bee.
Draw wings and legs with black fine liner.