Posts tonen met het label mixed media. Alle posts tonen

dinsdag 11 april 2023

Japanese cherry blossom on a plate

You need:

  1. paper plates
  2. acrylic paint: brown, green, red, white
  3. brush
  4. crepe paper: pink, white, red
  5. glue 
This lesson about the Japanese cherry blossom is an old one, but now the blossoms are made on a paper plate. Too pretty to use for dinner! 
Branches are painted, leaves too. Not too big, because leaves only grow well when the blossoms are gone. 
Blossom is partly painted and partly made of crumpled crepe paper. 


woensdag 27 oktober 2021

Autumn birches


You need: 

  1. drawing sheets A3 size
  2. painters tape in several widths
  3. liquid watercolor paint in red, green and yellow in rood, geel en groen
  4. brushes
  5. tempera paint  
  6. stipple brush
  7. old shopping card/customer card
  8. saucers
  9. jars
Choose thick drawing paper,  to avoid ripping when you remove the tape . 

Look at birch trees. What do you see?   
 

  • straight trunks
  • trunks are white
  • horizontal peeling bark banden
  • autumn color leaves: orange, yellow, brown, red
What to do?

Step 1
Palce the sheet on the table with the narrow site down.  Stick strips of tape from top to bottom. Wide for the trunks, narrower for the branches. Note: branches grow up and not down. 


Step 2
Paint the background in strips with diluted liquid watercolor. Let dry. Peel off the tape carefully. 

Step 3
Put some black tempera paint on a saucer. Dip your customer card in the paint. Pull this in several places from left to right (or right to left!) to halfway up the trunk to make the black streaks.

  
Step 4
Spray som warm colors tempera + green on a saucer.  Stipple leaves at the top of the trees using the stipple brush. Do not mix the colors, but use several colors at the brush at the same time.  


Step 5
Hang up! 


Artworks are made by students of grade 1. 

zondag 4 april 2021

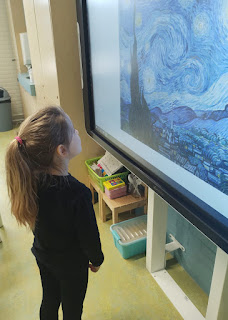
Starry Night like Vincent van Gogh


Show during both lessons hVan Gogh's painting Starry Night.  


Tell about Vincent van Gogh. Show Starry Night. Zoom in on the painting with Arts & Culture

The artwork students are going to make, will take two lessons.  

You need for the 1st lesson:
  1. black construction paper 
  2. aluminium foil
  3. piece of cardboard or a clay plate
  4. painter's tape
  5. tempera paint in blue and white 
  6. cotton swab
  7. brushes
  8. plate

Lesson 1
Wrap the cardboard/clay plate with aluminum foil and tape it on the back side. 

Step 1: For each pair of students there is a palette with blue and white paint. Students paint spiral shapes ons the aluminum foil with a brush and / or cotton swabs.


Stap 2: Make a print by placing a black sheet on top of your painting and pressing it.  

Stap 3: Remove the black sheet and let dry. 


 You need for the 2nd lesson:

  1. oilpastels in black, grey and purple
  2. tempera paint in yellow and white 
  3. black construction papier
  4. brushes
  5. scissors
  6. glue
  7. plate
Step 4: Draw and color the mountains with oilpastels. Draw the wavy movements in the air. The lines must run parallel to each other and also go in the same direction during a movement.
Show students that you can fade the colors by smearing the oil pastel. This way you can also make the colors darker or lighter.


Step 5: Determine where the large dark cypress should be and cut it out of black paper. (In grade 3 we gave students a shape to trace for the cypress.)


Step 6: Cut houses and glue them on tje painting. Draw lighted windows with oilpastels.  


Step 7: Paint moon and stars with tempera. 

Artworks are made by students of grade 3.

Elements of art: color, line, nuance, texture.


zaterdag 3 april 2021

Water lilies on a plate


By a student of grade 1

Claude Monet (1840-1926) is considered one of the most important painters of Impressionism. 

 Typical for Impressionists:

  • they choose subjects from ordinary life 
  • special attention for light and color
  • work in the open air
  • smooth brushstrokes
  • dashes resemble a sketch
  • it's about the impression!

Monet had a large garden with a pond and a Japanese bridge in Giverny France. He liked to paint in that garden. His works of water lilies are therefore famous.

Discuss the term impressionism. Show some paintings by Monet and zoom in on a work with water lilies in Arts & Culture. Do students see the characteristics of impressionism in this artwork?

You need:
  1. paper plates
  2. tempera paint in blue and white 
  3. stencil brush
  4. white drawing sheet 
  5. tissue paper in green an light green 
  6. water and sponge
  7. tissue paper in pink and yellow
  8. mold of a water lily leaf
  9. glue
  10. scissors
Step 1:
Dab the plate with blue and white.  


Step 2:
Wet the white paper with a sponge. Cut squares from the green tissue paper. Place them on the wet paper and let the bleed. Let dry.


Step 3
Remove the tissue paper. Trace the mold of the lilyflower leaf and cut it out.  


Step 4
Fold the tissuepaper for the lily twice diagonally. Cut a flower shape. 


Step 5
Grab the flower shapes in the middle. Crumple them into a flower. Put a drop of glue on the lily leaf and stick the center of the lily on top. Roll a wad of leftover tissue paper and stick it in the center of the flower.

Elements of art: texture, color, space. 

vrijdag 31 januari 2020

Son of Man - Like Magritte


You need:
  1. white drawings sheets A3 size
  2. white and blue tempera paint 
  3. paper with stone print
  4. white round paper
  5. camera
  6. bowler hat and black coat 
  7. brushes
  8. small dishes
  9. sponges
René Magritte
Rene Magritte is born in 1898 in Belgium. When Magritte is 13 years old, his mother commits suicide. She jumps in the river Samber and is found with her dress covering her face. This image has been suggested as the source of several paintings from Magritte: people hiding their faces with several objects.
In 1924 Magritte became friends with members of a surrealism group in Brussels: André Breton, Joan Miró and Salvador Dalí. These artists influence Magritte's work. In the end Magritte became famous with surrealistic paintings.
Magritte gave his paintings a realistic effect of surrealism. He painted simple objects, like a shoe, an apple, a pipe or a tree. Magritte took these things out of their ordinary environment and placed them in a special surrounding.
One of Magritte's most famous works is "La Trahison des Images" (The Treachery of Images). This is a very realistic painting from a pipe, with the text: Ceci n'est pas une pipe (This is not a pipe). The painting is not a pipe, but rather an image of a pipe. As Magritte himself commented: "The famous pipe. How people reproached me for it! And yet, could you stuff my pipe? No, it's just a representation, is it not? So if I had written on my picture 'This is a pipe,' I'd have been lying!"
By putting us constantly on the wrong track, Magritte forces us to think about art. Magritte thought it the task of an artist to place reality in a different context.

Look at the artwork
Discuss the painting The son of man. What do you see? What does the man wear? What's on his head? Why can he see little? Can he see nothing of can he peek at the edge of the apple? What's wrong with his left arm? (his arm appears to bend backwards at the elbow). What do you see at the background? What does the sky look like?

How do you make this artwork?
Take photographs of the students wearing a bowler hat and a dark coat; arms hanging beside the body. Students paint their sheet blue and let it dry. Cut a wall out of stoneprint paper and stick it on the blue sky. Stamp white spots on the artwork using a sponge. Let dry againg. Cut the photo neatly along the edges and paste it on the blue sheet in front of the stoneprint paper. Draw a piece of fruit on the circle sheet and show color transitions, just like real fruit. Paste it on the face.


Both artworks are made by students of grade 1

donderdag 9 mei 2019

Picture book illustration


Students of grade 6 made this illustration. After a good study of the original illustration in a Dutch picturebook, they made a list of required materials to use for this artwork. The faces and arms are painted, the clothes and curtains are cut out of fabric, the wallpaper comes from a sample book for wallpaper and the flags are from scraps of paper.


vrijdag 12 oktober 2012

Owls in the moonlight

Background of dilluted water colour paint 

You need:
  1. drawing sheet 60 by 25 cm
  2. white drawing sheets
  3. brown wrapping paper
  4. indian ink 
  5. liquid water colour paint
  6. brushes
  7. pieces of styrofoam
  8. pencil
  9. flat piece of glass
  10. paint roller
  11. block printing ink
  12. chalk pastel
  13. saucer
Background of dilluted water colour paint  mixed with a drop indian ink  

Part one:
Put a saucer on the big sheet. This piece of paper remains white; the moon. Paint with highly diluted indian ink or liquid watercolor (also dilute it with water) and a large brush in one direction. Make sure the dish does not move. Paint with big strokes and leave the edges a little white. Let this dry.

Part two:
Divide the class into two groups. Group 1 paints the branch, group 2 is going to print owls.

Branch painting:
Paint with indian ink a branch with side branches on the painted sheet. Remember that a branch becoming thinner towards the end. Do not paint around the moon, but through it. If the branch stands out too little against the gray background, outline the branches later with white chalk for a better contrast.

Printing the owls:
Group 2 will start with the owls. Give each student two pieces of styrofoam. Students have to press two different owls in the foam. Put some blockprint paint on a glass plate. Roll the paint on the piece of foam. Then place a sheet (remember to write names on each sheet!) and rub with flat hand over it. Pull off the paper. Create several prints in different colors and on different kinds of paper. In this lesson we used white paper and brown wrapping paper.

A student who has finished printing, takes place on the painting table and paints his branch. Students who have completed the branch, follow up with printing.

Next day:
When the owls are dry (with block print this takes at least a day), they have to be cut leaving one millimeter space around. Use yellow chalk to draw a circle around the moon. Paste the owls on the branches.

Background of dilluted indian ink, branches outlined with white chalk pastel 

All artworks are made by students of grade 4

maandag 8 oktober 2012

Lollipop trees like Hundertwasser


Made by a student of grade 2
 
Friedensreich Hundertwasser (1928-2000) was an Austrian artist and architect who is best known for the colourful buildings he designed, built with attention to the environment and nature. The buildings of Hundertwasser are very recognizable: straight lines are missing, there is use of bright colours and many of his buildings have typical turrets. The influence of architect Gaudi is very obvious.
The paintings of Hundertwasser have exuberant colours too and mainly undulating lines.
 
Show buildings of Hundertwasser on the digital board. Discuss the salient features: bright colours, undulating lines. Then show some paintings and discuss the things that stand out:
 
the use of small areas outlined with black
no straight lines, usually parallel lines
recurring spiral shapes
bright colours
 
Ask students what they think of by seeing those spirals.  Probably they see real lollipops in them!  Lollipop trees, that's what we're going to draw today! Demonstrate the drawing of a spiral, starting in the middle.
You need:
  1. white drawing sheet 35 by 35 cm
  2. black construction sheet
  3. white drawing paper 35 by 35 cm
  4. black construction paper
  5. pieces of sponge
  6. tempera paint
  7. gold and silver markers, wide and small
  8. round shapes to trace
  9. scissors and glue
  10. black oil pastel
Stamp the white sheet with sponge prints in colours you like and put the work out to dry. Trace on black paper round shapes in different sizesDraw spirals in them with gold or silver markers. Fill the space between the lines with patterns in gold or silver and cut the circles.
Create a composition of lollipops on the stamped sheet and paste them. Pull lines from the lollipops to the bottom of the sheet with black oil pastel, the trunks. Draw the trunks through the circles if necessary (overlap), to show depth in the lollipop woods.


Thanks to Maureen Kaal.

woensdag 3 oktober 2012

Owls in the tree

Made by a student of grade 5
You need:
  1. grey construction paper
  2. white drawing paper A1 size and A4 size
  3. tempera paint
  4. brushes
  5. scissors
  6. glue
  7. linoleum 10 by10 cm
  8. lino knives
  9. flat piece of glass
  10. block printing ink
  11. lino press
  12. linoleum roller
I found this great lesson on Artsonia!

Before the lesson: ask two students to paint an A1 size sheet with brown tempera and a few yellow and red. This painted paper will be used for tearing branches and tree stumps by all students. 
Another A1 sheet should be painted in warm autumn colours; this sheet is used for cutting out leaves.

Each students draws an owl on linoleum. Cut the outlines, the wings, eyes and beak. Decorate with small patterns. Print the owl several times in two colours and leave them to dry.

Take a second lesson to finish the artwork. Tear stumps and branches from the brown painted paper and paste them on the grey sheet. Cut leaves from the autumn sheet. Cut the owls with a little edge (1 mm). Look for a great composition and paste everything.

zondag 24 juni 2012

On the beach - collage


You need:
  1. drawing sheet 40 by 35 cm
  2. white drawing sheets
  3. tempera paint
  4. brushes
  5. scissors
  6. markers
  7. glue
  8. pencils
Draw a word web with words about the beach. Think of things (to do) on the sand, things (to do) in the water and things (to do) in the air. Talk about people standing in the water: they seem to have half legs!

Cover four tables with newspaper and put three containers with paint on it:
  • yellow and a little brown besides (beach) + two big brushes
  • blue and a little green (seawater) + two big brushes
  • blue and white (air) + two big brushes 
  • white (surf) + two brushes to stamp
Show how to paint the beach: much yellow on the brush and a little brown for the beach (so do not mix!). Do the same with blue and white for the air, and blue with green for the sea. Make wavy motions with the brush to accentuate the water. Finish with a white stamping brush for the surf.


While about four students are painting, the others can start with the drawing part of this lesson.

Draw people and things you see on the beach. Colour them with markers, and use a skin colour pencil for the bodies. Cut all those little drawings and paste them on the beach, the water or in the air.
Hang all work together for a great group work.

All artworks are made by students of grade 3

zaterdag 26 november 2011

Amsterdam by night

You need:
  1. white drawing sheet A4 size
  2. liquid water colour
  3. brush
  4. jar with water
  5. indian ink
  6. straw
  7. black and yellow construction paper
  8. scissors
  9. glue
Paint the white sheet blue or orange with liquid water colour; add water to get a brighter blue / orange above. Let dry. Drip some indian ink and blow it upwards with a straw. Cut a row of canal houses out of black paper and paste it on the coloured sheet. Cut and paste windows and a moon out of yellow paper.
Paste the artwork on a black sheet.
Artworks made by students of grade 4

maandag 21 november 2011

Northern lights


You need:
  1. black construction paper A4 size
  2. chalk pastel
  3. white wallpaper with texture
  4. scissors
  5. glue
  6. fine black marker
I found this lesson via Flickr on Pinterest, but don't know to whom I have to give credit...
Show some northern light movies on Youtube. What can you tell about the colours? What movements do you see?

Draw a horizon line a little below the middle of a black sheet. Use different colours chalk pastels to colour the sea. Do not use too much chalk, so that it can be smudged.
Cut a strip of mountains out of black paper. Paste it on the horizon line. Use white chalk pastel to make snow on the mountains. Draw the northern light above the mountains. Smudge colours.
Draw a polar bear on an ice floe on the back of a piece of white wallpaper. Cut out. Draw details with a fine black marker. Paste the polar bear on the sea.
Finally paste the artwork on a bright coloured sheet.

By students of grade 5

zaterdag 5 november 2011

Building a burger


I did this lesson in October 2009, and soon saw it on many blogs. It's still one of my favorite lessons.
This week we had the Dutch Week of School Breakfast, a good reason to build a lot of new burgers with students of grade 4.
How to do this? Look at this post.

maandag 31 oktober 2011

Printed mushrooms, group work

Group work by students of grade 3

You need:
  1. piece of linoleum 15 x 15 cm
  2. lino knife
  3. block printing ink
  4. flat piece of plexiglass
  5. linoleum roller
  6. white sheets
  7. lino press
  8. autumn leaves
  9. scissors
  10. glue
  11. coloured cardboard
Draw a mushroom on your linoleum. Cut away the linoleum around the mushroom. Remember: what you cut away will not print. It is not important to carve deeply into linoleum, just enough so that carved area is lower than the linoleum surface. Always carve away from your hand, always keep your hand behind the back edge of linoleum. When you want to check your printing block, place a piece of paper on the linoleum and rub over the paper with a crayon. This will create a “rubbing” and will give you an idea of what the final print will look like.
Squeeze out “toothpaste” amount of ink on plexiglass. Roll ink out. The ink is ready when lines appear. Ink should look wet. 
Put your linoleum block on a newspaper. Roll one or two colours ink onto the linoleum printing block, working quickly to cover all areas. Lay the block on a sheet in the printing press and press. Take away the block and your print is ready.


To make a group work, all students have to cut out on of their their prints. Leave a white edge around the mushroom. Ask some students to make a collage of all mushrooms on  a piece of dark coloured cardboard. Paste some autumn leaves on the bottom of the collage.

zaterdag 8 oktober 2011

Haunted house in the moonlight

Made by a student of grade 6
You need:
  1. white drawing sheet A4 size 
  2. black construction paper
  3. yellow chalk pastel
  4. scissors
  5. cutting knife
  6. lijm
  7. white pencil
  8. black marker
  9. blue and purple tempera paint
  10. sauzer
  11. sponge
This lesson is all about Halloween and haunted houses. First make a word web about haunted houses: skeletons, spiders, bats, old, tombstones, dark, scary, etc.

Tear a strip of black paper from about 5 cm and paste it on the bottom of the white sheet: the ground. Draw on black paper ahouse that looks old and cut it out.


Use a cutter for doors and windows. Paste the house on the white sheet. Draw details such as bricks, ghosts, spiders, webs with a white pencil. Use a black marker to draw things in the white window openings.
Cut a circle, the moon, from a scrap of paper and lay it on the work. Outline moon and house with a yellow chalk pastel and smudge the chalk outwards. 


Use a sponge piece to stamp the background with purple and blue tempera paint. Do not get too close to the yellow chalk. Finally paste the artwork on a yellow background sheet.

zondag 21 augustus 2011

Sunflowers in five different materials

You need:
  1. sunflowers or pictures of them
  2. white drawing sheet A1 size, cut in strips of 30 by 65 cm
  3. five different colouring materials, like colour pencils, tempera paint, watercolour paint, oil pastels, crayons, coloured ink, aquarell pencils etc.
  4. brushes
  5. pencil, ruler
  6. coloured paper
  7. scissors
Look with the students at some sunflowers or pictures of them. How thick is the stem, what can you tell about the leaves, how are the petals divided, what colours do you see in the heart of the flower, etc.

Divide the sheet with thin lines into five strips of 13 cm high. Draw some sunflowers. Make sure the flowers themselves are drawn at the demarcation of the strips. Make sure too that in each compartment at least half a sunflower or leave is drawn.
Choose five different colour materials. Use in every compartment a different material. Consider yourself the order of the materials, for example from bright (markers) to less bright (aquarelle pencils).
Paste the work on a coloured background. Or cut the five compartments and paste them with some space between on a coloured background.
Made by students of grade 5

woensdag 3 november 2010

Cool web, big spider

You need:

  1. white drawing paper 20 by 20 cm
  2. left overs of white drawing paper
  3. yellow crayons
  4. liquid watercolour
  5. thick brush
  6. jar with water
  7. scissors
  8. glue
  9. black construction paper

Students draw a web with a yellow crayon. The easiest way is to first draw diagonal lines from the corners of the paper. Then draw more lines from top to bottom, left to right. The lines must all go through the center. After this draw circles around the center, until the sheet is full.

Paint the sheet using liquid watercolour ink in cold colours. Take two colours. Leave the work to dry.

Draw some leaves with a warm colour crayon on a white sheet. Draw the veins. Paint the leaves with warm colours liquid watercolour. Let the leaves dry.

Make a spider of black construction paper. In the example above, the spider is made of a circle with a diameter of about 4 cm. Cut the circle in to the center and stick the cutting edges on each other so the center rises. Draw a cross on the back if you want to. Cut a smaller circle for the head, draw eyes on it and paste it on the body of the spider. Cut the feet: 8 strips of 8 cm by 1/2 cm. Glue the legs on the underside of the body. Make a fold inwards on the mid of the strip, and 1 cm from the end a fold outwards.

When the work is completely dry, cut the leaves and paste them on the web. Put the spider in the web by pasting the lower parts of the legs and the head.

Paste the artwork on a black background. You may draw the spider web lines on the background too.