zondag 4 april 2021

Starry Night like Vincent van Gogh


Show during both lessons hVan Gogh's painting Starry Night.  


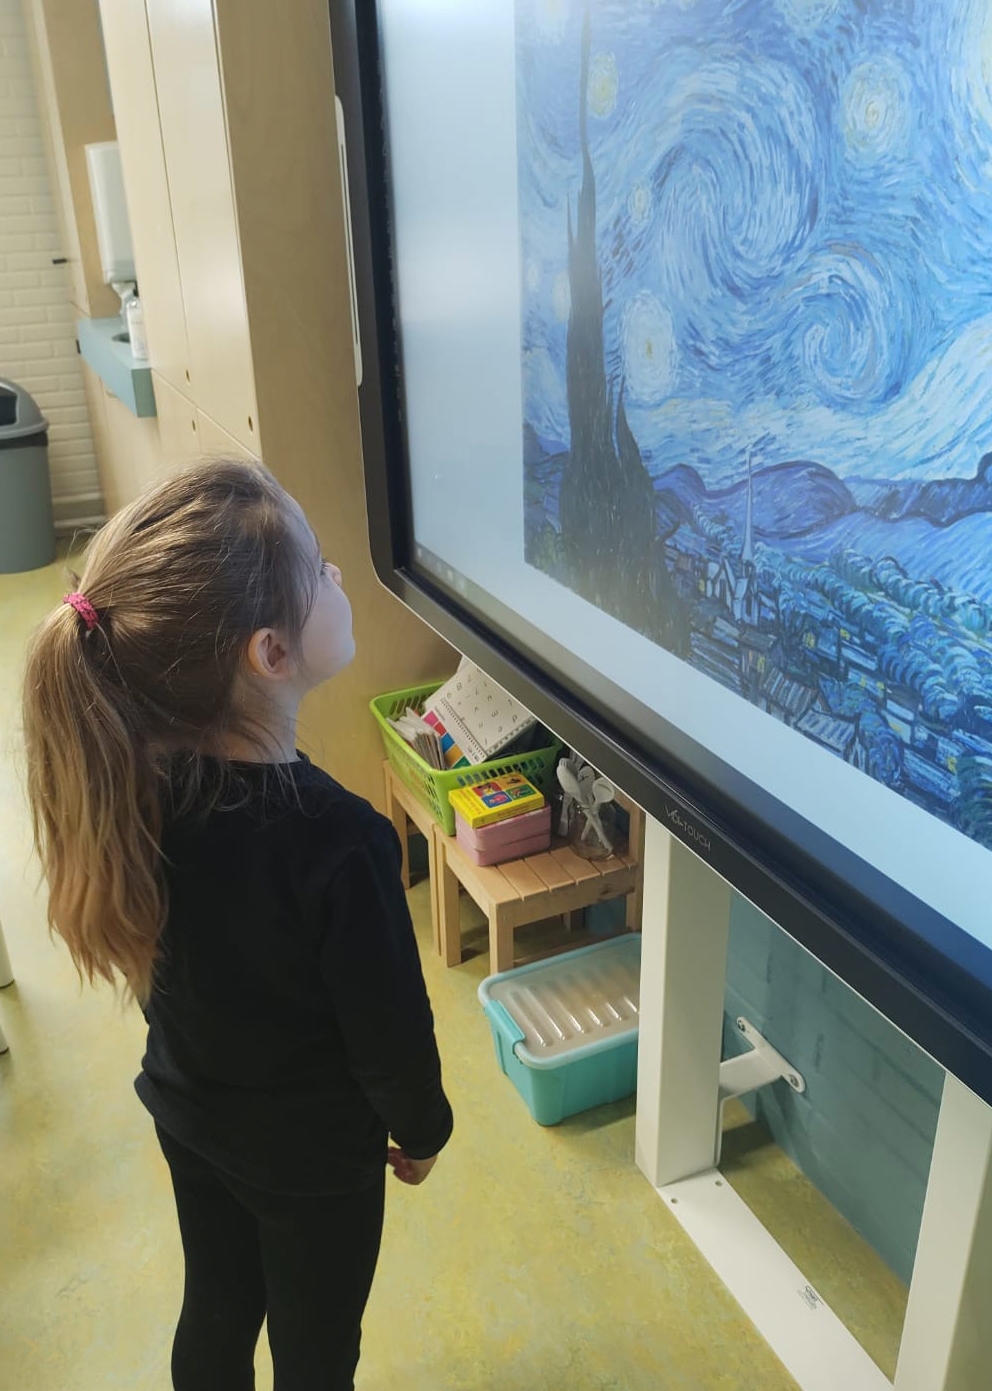
Tell about Vincent van Gogh. Show Starry Night. Zoom in on the painting with Arts & Culture

The artwork students are going to make, will take two lessons.  

You need for the 1st lesson:
  1. black construction paper 
  2. aluminium foil
  3. piece of cardboard or a clay plate
  4. painter's tape
  5. tempera paint in blue and white 
  6. cotton swab
  7. brushes
  8. plate

Lesson 1
Wrap the cardboard/clay plate with aluminum foil and tape it on the back side. 

Step 1: For each pair of students there is a palette with blue and white paint. Students paint spiral shapes ons the aluminum foil with a brush and / or cotton swabs.


Stap 2: Make a print by placing a black sheet on top of your painting and pressing it.  

Stap 3: Remove the black sheet and let dry. 


 You need for the 2nd lesson:

  1. oilpastels in black, grey and purple
  2. tempera paint in yellow and white 
  3. black construction papier
  4. brushes
  5. scissors
  6. glue
  7. plate
Step 4: Draw and color the mountains with oilpastels. Draw the wavy movements in the air. The lines must run parallel to each other and also go in the same direction during a movement.
Show students that you can fade the colors by smearing the oil pastel. This way you can also make the colors darker or lighter.


Step 5: Determine where the large dark cypress should be and cut it out of black paper. (In grade 3 we gave students a shape to trace for the cypress.)


Step 6: Cut houses and glue them on tje painting. Draw lighted windows with oilpastels.  


Step 7: Paint moon and stars with tempera. 

Artworks are made by students of grade 3.

Elements of art: color, line, nuance, texture.


zaterdag 3 april 2021

Water lilies on a plate


By a student of grade 1

Claude Monet (1840-1926) is considered one of the most important painters of Impressionism. 

 Typical for Impressionists:

  • they choose subjects from ordinary life 
  • special attention for light and color
  • work in the open air
  • smooth brushstrokes
  • dashes resemble a sketch
  • it's about the impression!

Monet had a large garden with a pond and a Japanese bridge in Giverny France. He liked to paint in that garden. His works of water lilies are therefore famous.

Discuss the term impressionism. Show some paintings by Monet and zoom in on a work with water lilies in Arts & Culture. Do students see the characteristics of impressionism in this artwork?

You need:
  1. paper plates
  2. tempera paint in blue and white 
  3. stencil brush
  4. white drawing sheet 
  5. tissue paper in green an light green 
  6. water and sponge
  7. tissue paper in pink and yellow
  8. mold of a water lily leaf
  9. glue
  10. scissors
Step 1:
Dab the plate with blue and white.  


Step 2:
Wet the white paper with a sponge. Cut squares from the green tissue paper. Place them on the wet paper and let the bleed. Let dry.


Step 3
Remove the tissue paper. Trace the mold of the lilyflower leaf and cut it out.  


Step 4
Fold the tissuepaper for the lily twice diagonally. Cut a flower shape. 


Step 5
Grab the flower shapes in the middle. Crumple them into a flower. Put a drop of glue on the lily leaf and stick the center of the lily on top. Roll a wad of leftover tissue paper and stick it in the center of the flower.

Elements of art: texture, color, space. 

donderdag 1 april 2021

Paint like an impressionist

This lesson is an exercise for painting an impressionist work.

You need:
  1. white drawing sheet
  2. tempera paint in red, blue and yellow
  3. small brushes
  4. paper towels
View impressionist paintings, for example from Claude Monet or Van Gogh. Zoom into Starry Night from Van Gogh using this link
What do you see?
  • the painting is made out with loose dashes.   
  • the dashes indicate a direction or movement, they are not just placed.
  • you can see the canvas between the dashes. The color of the canvas is therefore part of the painting. 
View a sunset picture. 


What do you see?
  • the sun is reflected in the water 
  • the sun's rays point left, up and right
  • the horizon is half way the photograph 
Exercise before you get started: 
  • Practice painting short strokes on a scrap. To do this, always lift the brush from the paper.
  • Practice with two colors on your brush; do not mix!
  • Make narrow / wide strokes by turning / not turning your brush.
  • Clean the brush for a new color with a paper towel, do not use water!
And now the artwork:

  • Fold your drawing sheet in half lengthwise, this is the horizon line.
  • Draw with pencil a semicircle on the horizon line, this is the sun.
  • Paint the sun orange: apply red and yellow to your brush. Do not mix!
  • Paint the sun's rays with yellow and very little red. Put something on your brush of both colors and make short strokes by lifting the brush from the paper each time. Also leave white between the strokes.
  • Also make the reflection of the sun in the water. Beware: the direction of the brushstrokes is now horizontal, just like the water.
  • Make the sky with blue and white (again add two colors to the brush). Use white to make a lighter blue. Follow the direction of the sun's rays. Don't make the sky completely full, you have to keep seeing paper.
  • Paint the sea with blue, white (and maybe green). Do not mix! The direction is horizontal here. Think of the white space between the lines.
Elements of art: line, color, nuance.

maandag 15 maart 2021

Snowdrops

 You need:

  1. white construction paper 10 by 10 cm and 15 by 15 cm
  2. oilpastel
  3. soft crayons
  4. white drawing sheet
Draw a frame around the drawing sheet at 1 cm from the edge. Color the background with oil pastel, pastels or a combination of these. Only use the colors yellow, green and blue.
Draw two flower stems with green oil pastel. 
Fold two snowdrops from the white sheets. Stick them on the work. 


Elements of art: color, nuance. 

zondag 7 februari 2021

Design a chips bag


 You need:
  1. drawing paper 
  2. pencil
  3. pictures of chips bags 
  4. color pencils
  5. black marker 
Look at chips bags and discuss what stands out. 
  • the name of the chips is usually at the top of the bag
  • the name is large and sometimes in 3D letters 
  • bright colors
  • taste and weight is on it
  • it has an image of one or more chips 
  • special features can be on it, like New, Party Pack or Less Fat 

Draw the wavy outlines of a chips bag. Think of a name and flavor for your chips. Draw the name on the bag in large 3D letters. Draw some chips on the front. Write the weight on the bag and some details. 
Color with color pencils or aquarel pencils. Outline letters and details with a fine black marker. 

Thanks to Pascal Cuijpers and his students (Connect College, Echt - NL) for this lesson. 

donderdag 21 januari 2021

Covid haircut


made by a student of grade 5

You need:

  1. white drawing sheet 
  2. pencil
  3. color pencils
Hairdressers have been closed for a while because of the epidemic …. what consequences does that have? 


How do you look now? Or your parents? Or a famous person? 

Assignment: 
Draw a portrait of yourself or someone else with a Covid haircut. 
Choose which materials you use and whether you draw in black and white or in color.  
Difficult to draw a portrait? No, watch this video about face proportions. 

Beeldaspecten: vorm, lijn, ruimte. 

Collage in one color

 You need:

  1. several things in one color 
  2. camera


This is a homeschooling assignment. 
1. Collect small items of the same color in your house. The more, the better!
2. Place them on a white surface. 
3. Your items may touch each other, but don't have to. 
4. Make sure the edges are straight.
5. Take a picture of your collage.
6. Send the photo to your teacher. 
 
Elements of art: space, color. 

The photo's and collages are made by students of grade 2.


maandag 28 december 2020

Stained glas animals

 
made by students of grade 5

You need:

  1. black construction paper 
  2. wax paper in several colors
  3. white pencil
  4. ruler
  5. cutting mat 
  6. cutting knife
  7. glue

A stained glass window is a window in which several pieces of (mostly colored) glass are stuck in frames of lead. Stained-glass windows were made in times when it wasn't possible yet to make a window in one piece. We see those stained glass windows in old houses, but especially in churches. The light from outside enters in multiple colors into the church. 

View stained glass windows and tel about their origin and the effect of the colored light.  

Use a white pencil to draw an animal on the black sheet. Draw at least three lines from the animal to all edges of the sheet. Divide the animal into some surfaces. 
Make all lines 1 cm wide. Hatch the surfaces between the 1 cm lines with the white pencil.
Cut the white area's. When ready, use the black sheet as a template to draw the pieces of wax paper. Cut them out with an extra 0,5 cm and stick them behind the window. Make sure that there are no two same colors next to each other. 

Elements of art: line, shape, color. 
Technique: cutting.
Connecting with: history. 

zondag 13 december 2020

3D winter or Christmas scene


made by students of grade 5/6

You need: 

  1. white cardboard 21 by 21 cm
  2. colored glace paper 14,5 by 14,5 cm
  3. cutting knife 
  4. cutting mat
  5. glue

Too difficult or not enough time? Skip step 1 and 2. 

Step 1
Draw a square at 2 cm from the edges, this is the outside of the frame. 

Step 2
Draw in this square another square at 3 cm of the edges: this is the front of the frame.  

Step 3
Draw in the 15 by 15 cm square a simple winter or Christmas scene.  Make the lines 1 cm wide and make sure they are on 4 sides attached to the 1 cm wide frame. See pattern below. 

Step 4
Color the parts you have to cut out grey.  

Step 5
Cut out the grey parts. 

Step 6
Cut the corners diagonally, see pattern. 

Step 7
Fold the lines of the 15 by 15 square. 

Step 8
Stick the corners.

Step 9
Stick the glace paper in the frame. 


Elements of art: line, form, space.


vrijdag 27 november 2020

Scratch a Christmas ball

You need:
  1. drawing sheet
  2. oli pastels or crayons
  3. black tempera paint 
  4. brush
  5. alufoil 
  6. ribbon
  7. toothpick or skewer
Color the sheet with crayons. Paint it over with black tempera paint and let dry. Scratch with a toothpick or skewer a Christmas ball and fill it with patterns. 
Cut a small piece of aluminumfoil and paste it on the ball with a folded ribbon under it. 

made by students of grade 6

Elements of art: line (pattern)


zaterdag 21 november 2020

Winter tree in warm-cool colors

 You need:

  1. drawing sheets 25 x 32,5 cm
  2. crayons
  3. watercolor paint
  4. black tempera 
  5. brushes
  6. jar with water
With crayon: draw a horizonline and a tree trunk from the bottom of the sheet. Draw branches that touch the edges of the sheet. Draw a pattern in the landscape below the horizon. 
With watercolor paint: paint the sky. Paint the surfaces between the branches in warm or cool colors. Paint the surfaces in the landscape: warm if you first chose cool, cool if you first chose warm. 
With tempera: paint the branches and trunk black. 

Elements of art: color (warm and cool), space, line (pattern)

artworks made by students of grade 4

zondag 8 november 2020

Same insect - different colors


made by student of grade 1

You need:
  1. drawing sheets A5 size
  2. crayons
  3. liquid watercolor paint 
  4. brush
Draw two the same insects and color them with crayons: one with cool colors, the other with warm colors. 
Paint the background with dilluted watercolor paint: warm colors for the 'warm' insect, cool colors for the 'cool' insect. 


Element of art: color.

vrijdag 30 oktober 2020

Mondrian, a bit different

 You need:

  1. white drawing sheet
  2. markers
  3. ruler
  4. pencil
Draw a Mondrian, but change one of the elements of art. For example: 
  • do not draw squares and rectangles, choose another geometric shape
  • do not color with primary colors, choose maximum four other colors
Draw your alternative Mondrian and color it with markers. Outline with black marker. 

Elements of art: color, shape, line. 

donderdag 29 oktober 2020

Mondrian in chalk pastels

 You need:

  1. black construction paper 
  2. pencil
  3. ruler
  4. chalk pastels 
  5. Elmer's glue 
  6. fixing spray
Look at and discuss about the artwork of Piet Mondrian.

Draw squares and rectangles on the black sheet using a pencil and a ruler. trace the lines with Elmer's glue. The glue will become transparent when it has dried. 
Color the squares and rectangles with soft pastels in white, black, red, yellow and blue. Instead of black pastels, you can leave some areas open. Be sure you don't get two areas of the same color next to each other. 
Fix the work with hairspray or fixative spray. 

Elements of art: color, shape, line. 

Still life with fruit

door leerlingen van groep 5

You need:
  1. corrugated cardboard
  2. scissors
  3. white drawing sheet
  4. tempera paint
  5. brush
  6. glue
  7. colored construction paper
Vies and discuss still lifes of fruit in different styles (for example Caravaggio and Cezanne). How is the fruit arranged? Why at that way? Which parts are light and which parts are dark? What does that mean? 


Provide each group of students with a bowl of different fruit types. Students paint the fruits (no drawing first!) after a good observation. 
Cut a fruit bowl out of the cardboard. Cut out the fruits with a small white edge. Stick the fruits on a colored sheet, be sure to let them overlap each other. Stick the cardboard bowl. Some fruits will partly disappear in it. 

Elements of art: space, color, value. 

donderdag 22 oktober 2020

Keith Haring figures on tissue paper

made by students of grade 3

You need:
  1. colored tissuepaper
  2. white drawing sheet
  3. jar with water
  4. brush
  5. scissors
  6. templates of Haring figures
  7. pencil
  8. black marker

Choose 2 or more colors of tissuepaper. Fold them in 16 squares. Cut out. 
Take a sheet of drawing paper, make it wet with a brush and water. Lay the pieces of tissue paper on this wet sheet and see how they bleed. Fill the whole sheet and be sure to use enough water. 
Let dry and remove the tissue papers. 
Cut two or more Haring templates and outline them with a pencil. Trace those lines with black marker and trace them again to make nice bold lines. 

zondag 18 oktober 2020

In 'The Factory' of Andy Warhol

made by students of grade 1

You need: 

  1. colored paper 12 by 12 cm
  2. black construction paper 50 cm by 15 cm 
  3. tempera paint
  4. brushes
  5. apples
  6. glue
  7. black marker 

Tell about Andy Warhol's Factory. 

First lesson: "We are going to work today in the factory of Andy Warhol. Choose four colored sheets. Make apple prints in complementary colors: on a blue sheet you print an orange apple, on a red sheet you print a green apple etc."

Let dry and paste the colored sheets on black construction paper.

Second lesson: make a second print in a complementary color: on the orange apple you print a blue one etc. Let dry. Outline the apples with a black marker and add seeds and stem. 


vrijdag 16 oktober 2020

Pumpkins like Yayoi Kusama

made by a student of grade 4

 You need:

  1. black construction paper
  2. colored paper
  3. black marker
  4. black fineliner
  5. scissors
  6. glue
  7. white pencil
Yayoi Kusama (1929) is a Japanese artist. She creates paintings, sculptures and large installations with mirrors and lots of light symbolizing infinity. All her artworks have one thing in common: polka dots. That's why she's affectionately known as 'the princess of polka dots'. 
From an early age Kusama wanted to make art, but her traditional Japanese parents didn't like this. That's why Kusama left for NewYork and joined artists there, including Andy Warhol. 

By adding all-over marks and dots to her paintings, drawings, objects and clothes she feels as if she is making them (and herself) melt into, and become part of, the bigger universe. She said:

‘Our earth is only one polka dot among a million stars in the cosmos. Polka dots are a way to infinity. When we obliterate nature and our bodies with polka dots, we become part of the unity of our environment’.

View and discuss artwork of Kusama. 
  • use of large and small polka dots 
  • backgrounds are often filled with triangles
  • use of bright colors
  • her installations suggest infinity
Draw three pumpkins on the colored sheets and cut them. Draw bigger and smaller dots on the segments with markers. Draw triangels on the black sheet with a white pencil - start with a zigzag line. Paste the pumpkins on the black sheet.